
This post contains affiliate links. If you buy through our links, we may earn a small commission at no extra cost to you.
A disorganized workshop wastes time and causes accidents. Here’s the zone-based system for tool storage, workbench layout, and wall organization that keeps everything findable and the floor clear.
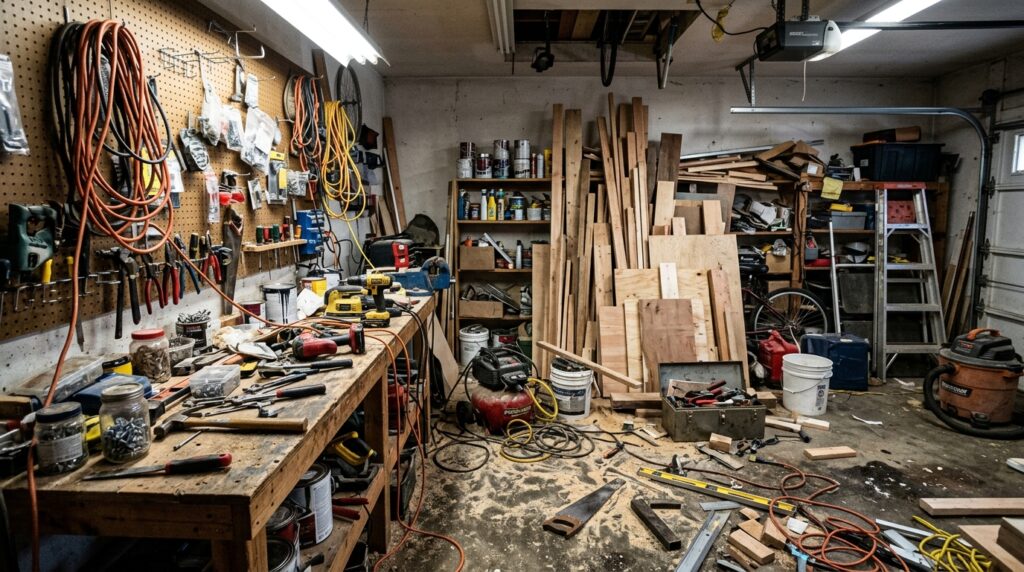
A disorganized workshop doesn’t just waste time — it’s a safety hazard. Tools on the floor get stepped on. Bits and blades get lost in piles. Extension cords become trip hazards. The average DIYer spends 20–30 minutes per project just finding tools.
The fix is a zone-based system: assign every tool category its own space, add the right storage for each category, and keep the floor clear. A workshop can be organized in a single weekend regardless of how cluttered it currently is.
Quick answer: Start with a full purge, then divide the workshop into zones — workbench zone, power tool zone, hand tool wall, lumber/material storage, and consumables. Add a pegboard for hand tools, wall-mounted storage for power tools, and a solid workbench as the anchor. Keep the floor clear of everything except large floor equipment.
⭐ Essential Product:
Wall Control 4 ft. Steel Pegboard Tool Organizer — 16×32-inch steel pegboard panels (steel won’t bow like wood), pre-drilled, modular — add panels as the collection grows. Includes starter hook kit. The foundation of any hand tool wall.
Also essential:
- Workbench: Seville Classics UltraHD Heavy-Duty Steel Workbench — 46×24-inch work surface, 2,000 lb capacity, lower shelf for power tools, built-in power strip. Anchors the entire workshop.
- Power Tool Storage: Milwaukee Packout Modular Storage System — stackable, locking, rolling cases that keep power tools organized, protected, and portable.
Step 1: Empty and Purge
Pull everything out of the workshop area. Everything — tools, hardware, lumber scraps, paint cans, boxes of unknown contents.
Sort into:
- Keep and use — tools and materials actively used in the last 12 months
- Keep but store elsewhere — seasonal items, items that belong in the house, garden tools (give them their own zone or area)
- Donate/sell — duplicate tools, tools in good condition you no longer use
- Trash — broken tools beyond repair, dried paint, rusted unusable hardware
Be specific about duplicates. Most workshops accumulate multiples of common tools — three hammers, two tape measures, four screwdriver sets. Keep the best of each. Duplicates become clutter that hides the tool you actually want.
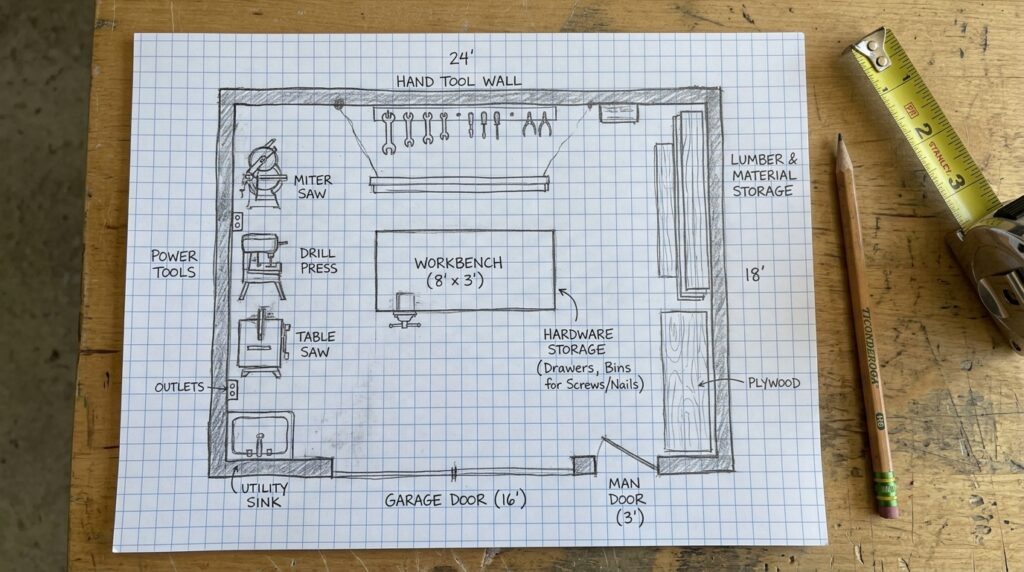
Step 2: Define Your Zones
Map your workshop into functional zones before buying any storage. Zone placement determines workflow — put frequently used items closest to the workbench and primary work area.
Standard workshop zones:
| Zone | What Goes Here | Best Location |
|---|---|---|
| Workbench | Primary work surface, hand tool access | Center of workshop, good lighting |
| Hand tools | Hammers, screwdrivers, pliers, chisels | Wall pegboard directly above/behind workbench |
| Power tools | Drills, circular saw, jigsaw, sander | Shelving or cabinet at or near workbench level |
| Lumber & materials | Wood scraps, sheet goods, pipe, conduit | Against a wall, vertical storage preferred |
| Finishing & paint | Stains, paints, brushes, rollers | Away from heat sources, low shelf |
| Hardware & fasteners | Screws, nails, bolts, nuts, anchors | Small bins near workbench |
| Safety & consumables | Sandpaper, blades, safety glasses, gloves | Near where they’re used |
Step 3: Set Up the Workbench
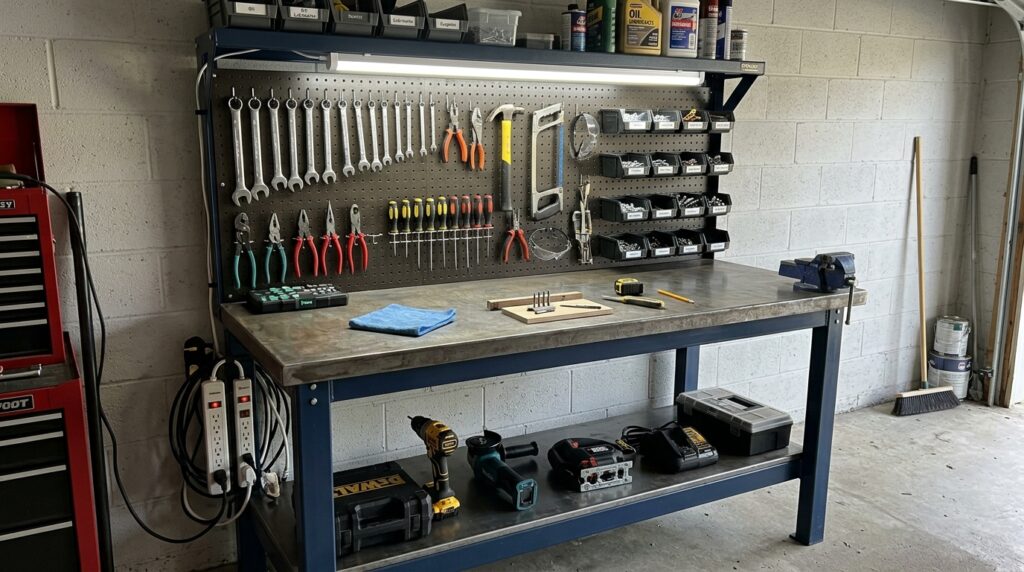
The workbench is the anchor of the workshop. Everything else organizes around it.
Workbench Requirements
- Solid work surface: Minimum 24 inches deep, 36–48 inches wide. MDF or hardwood top for most DIY work.
- Correct height: Standard is 34–36 inches — elbow height when standing. Too low causes back pain; too high causes shoulder fatigue.
- Storage below: Drawers or a lower shelf for power tools and heavy items.
- Power: At minimum, a power strip mounted to the bench frame. Ideally, a dedicated circuit at the bench location.
- Lighting: Overhead shop light directly above the bench surface — shadows cause measurement errors and accidents.
Our Pick: Seville Classics UltraHD Workbench — 46×24 inch steel work surface, 2,000 lb capacity, lower shelf, pegboard back panel included.
Workbench Lighting
A workbench without good lighting is frustrating and dangerous. Add a dedicated LED shop light directly above the work surface.
Our Pick: Barrina LED Shop Light 4ft 40W — plug-in, linkable (chain multiple lights), 5000K daylight color temperature. Around $35 for 2-pack. Install directly above the workbench.
Step 4: Install the Hand Tool Wall
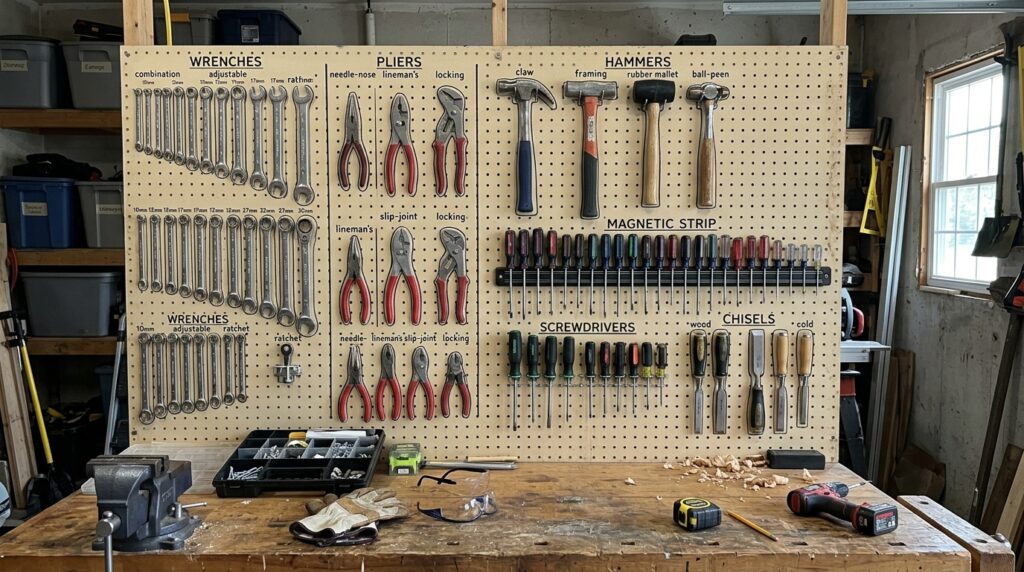
The hand tool wall is the most visible part of the workshop — and the most impactful for daily efficiency. Seeing all your tools at once eliminates the “where is the X?” problem completely.
Pegboard System
- Mount pegboard panels to the wall behind and above the workbench
- Add hooks sized for each tool category — large J-hooks for hammers, small hooks for screwdrivers, holders for pliers
- Arrange by frequency: most-used tools at eye level and center, specialty tools to the sides and higher
- Outline tools with a marker or tool silhouette — makes it immediately obvious when something is missing and where it goes back
Our Pick: Wall Control Steel Pegboard Panel — steel (won’t bow), 16×32 inch, comes with hooks. Around $50 per panel. Two panels cover most hand tool collections.
Magnetic Tool Strip
For screwdrivers, chisels, and small metal tools, a magnetic strip is faster than pegboard hooks — tools just attach and come off without hooks.
Our Pick: Master Magnetics 24″ Magnetic Bar Tool Organizer— industrial strength, holds 20 lbs, mounts with two screws. Around $25.
Step 5: Organize Power Tools and Hardware
Power Tools
Power tools need protection from dust and damage when not in use. Three options:
Option A — Cases: Keep each tool in its original case or a Pelican/Milwaukee Packout case. Stack on a shelf or in a cabinet. Most organized but slowest to access.
Option B — Open shelving: Line power tools up on a dedicated shelf — visible, fast to grab, but exposed to dust. Best for tools used frequently.
Option C — Wall-mounted holders: Drill holsters, saw hooks, and tool holders mount tools directly to the wall — off the floor and shelf, fully visible. Best for tools used almost daily.
For most DIYers: frequently used power tools on open shelving, less-used tools in cases stored below.
Hardware and Fasteners
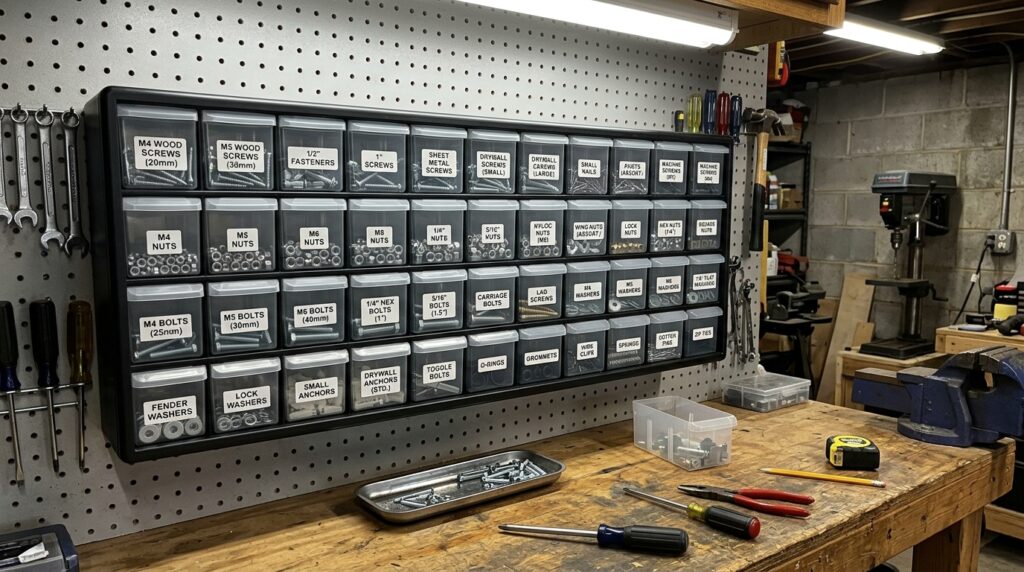
Hardware is the most chaotic element of most workshops. A small parts organizer with labeled compartments eliminates the “dig through a coffee can of random screws” problem.
Our Pick: Akro-Mils 44-Bin Wall-Mounted Parts Organizer — wall-mounted, 44 clear bins, removable individual bins. Around $45. Mount near the workbench for immediate access.
Hardware organization by category:
- Wood screws (by size)
- Drywall screws (by length)
- Bolts, nuts, washers (by diameter)
- Anchors and toggles
- Nails (by type and length)
- Miscellaneous (hooks, staples, clips)
Step 6: Lumber and Material Storage
Lumber stored on the floor is a trip hazard and warps faster than lumber stored vertically or on proper racks.
Vertical Wall Rack (Best for Long Boards)
Mount 2×4 lumber vertically in a wall-mounted rack — takes minimal floor space, keeps boards straight, easy to sort by length.
Our Pick: Wall Mounted Lumber Storage Rack — adjustable steel arms, holds boards and sheet goods vertically. Around $60.
Sheet Goods Storage
Plywood and sheet goods need to stand vertically — flat storage causes warping. A simple rack of 2×4 uprights with horizontal pegs every 12 inches stores multiple sheets accessibly.
Scrap Wood
Scrap wood is the workshop’s biggest clutter generator. Separate into:
- Usable pieces (over 12 inches long, no major defects) → vertical storage bin
- Short scraps (6–12 inches) → labeled bin, limited quantity — if the bin is full, it’s time to use or toss
- Cutoffs under 6 inches → trash immediately
Workshop Organization Quick Checklist
Initial setup:
Full purge completed — duplicates and broken tools removed
Zones defined on a paper sketch before buying storage
Workbench positioned with good lighting overhead
Storage installed:
Pegboard wall behind workbench for hand tools
Magnetic strip for screwdrivers and chisels
Power tools on shelving or wall holders
Hardware in labeled bin organizer
Lumber stored vertically off the floor
Maintenance system:
Every tool has one specific home
Tool silhouettes or labels on pegboard
Hardware bins labeled by category and size
Scrap wood bin with size limit enforced
Safety:
Floor clear of tools, cords, and lumber
Extension cords on retractable reel or wall hook
Fire extinguisher mounted near exit
Safety glasses and hearing protection at eye level near workbench
Frequently Asked Questions
How much space do I need for a workshop? A functional workshop can fit in a single-car garage bay (roughly 10×20 feet) or even a dedicated 8×10 corner of a two-car garage. The key is vertical storage — walls, not floor space, hold most of the storage capacity. A 10×10 space with good wall organization outperforms a 20×20 space with everything on the floor.
What’s the most important workshop storage upgrade? A pegboard wall, if you don’t have one. Seeing all your hand tools at once — without opening drawers or digging through boxes — eliminates the most common time sink in workshop use. Install it first, before any other organization.
Do I need a workbench or can I use a folding table? A folding table works for occasional use but fails for regular workshop use — it’s too light to hold a vise, too low for standing work, and has no storage below. A proper workbench with a solid top and lower shelf is worth the $150–$200 investment if you use the workshop regularly.
How do I keep the workshop clean long-term? Two rules: everything goes back to its home after each use, and sweep the floor after every project. A wall-mounted broom and dustpan inside the workshop door makes sweeping a 2-minute habit rather than a production. The tool-goes-back-immediately rule is harder to maintain but is what separates a workshop that stays organized from one that reverts to chaos in a month.
Should I heat my garage workshop in winter? If you work in the workshop year-round, yes — a portable propane or electric heater ($50–$200) makes the space usable in cold weather. Insulating the garage door (see our garage door insulation guide) dramatically reduces how much heating is needed. A heated, insulated workshop is also better for wood storage — temperature fluctuations cause wood movement and warping.
The Bottom Line
A functional workshop comes down to one principle: every tool has one home, and it goes back there after every use. The pegboard wall makes hand tools visible and returnable. The workbench anchors the workflow. Hardware bins eliminate the random-screw-coffee-can problem.
Set it up in a weekend, enforce the one-tool-one-home rule, and the workshop stays organized indefinitely.
For the broader garage organization process including non-workshop items, our guide on how to organize a garage covers the full zone system from cars to seasonal storage.
Have questions about your specific workshop setup? Leave a comment below.
Related posts: