
This post contains affiliate links. If you buy through our links, we may earn a small commission at no extra cost to you.

Your garage is losing heat every time the temperature drops — and if it’s attached to your house, that cold is bleeding right into your living space. An uninsulated garage door is one of the biggest energy leaks most homeowners never think about.
The fix is easier than you’d expect. Insulating a garage door is a Saturday project that costs between $50 and $150 in materials, takes 2–4 hours, and can make a noticeable difference in how comfortable your garage feels — and how hard your heating system works.
Quick answer: The fastest method is a pre-cut garage door insulation kit with foam panels that press-fit directly into the door sections. No tools beyond a utility knife and a tape measure. Most homeowners finish in under 3 hours.
Here’s exactly how to do it, which materials work best for your situation, and what to avoid.
What You’ll Need
Depending on the method you choose, grab one or more of these:
- Garage door insulation kit (foam panels — easiest option)
- Tape measure and marker
- Utility knife or scissors
- Baking sheet or straight edge (for cutting guide)
- Foil tape (for sealing edges, optional)
- Work gloves (fiberglass batts are itchy without them)
No power tools required for the foam panel method.
Step 1: Measure Your Garage Door Panels
Before buying anything, measure the individual panels — not the full door.
Most garage doors are made of horizontal sections (panels) stacked on top of each other. Each panel has a rectangular recess in the middle where insulation fits. Measure the width and height of one recess, then count how many panels your door has.
Standard door sizes:
- Single car: 8×7 ft or 9×7 ft (typically 4 panels)
- Double car: 16×7 ft or 18×7 ft (typically 4 panels, wider)
Write down your panel recess dimensions before buying a kit — most kits specify which door sizes they fit.
Pro tip: Measure all four panels separately. Even on the same door, the top and bottom panels are sometimes slightly different sizes due to the track hardware.
Step 2: Choose Your Insulation Material
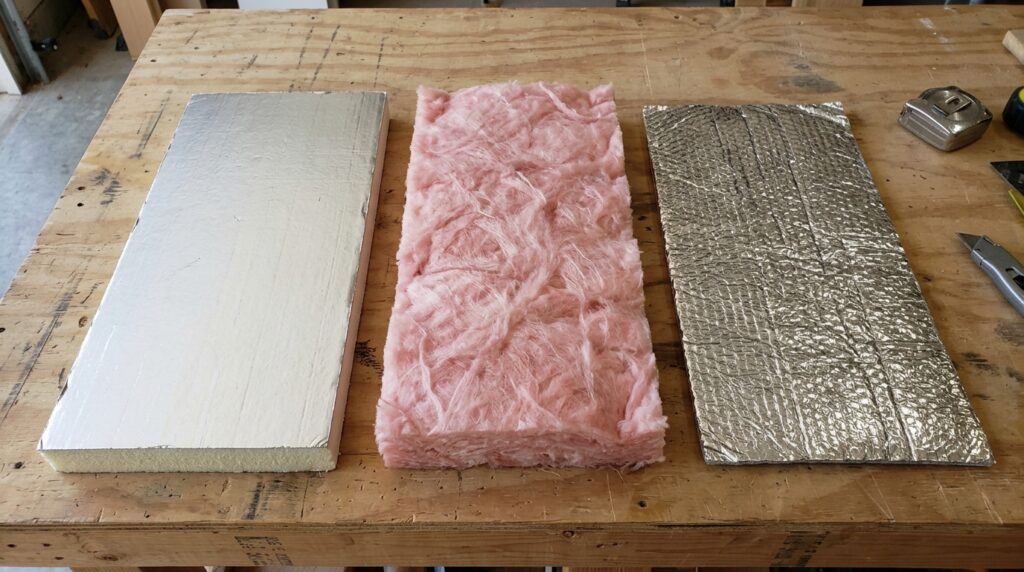
This is the most important decision. Three materials dominate the DIY market:
Option A: Pre-Cut Foam Panel Kits (Best for Most Homeowners)
R-value: R-4 to R-8 per kit
Cost: $50–$90 for a single car door, $80–$150 for a double
These kits come with pre-cut polystyrene or polyurethane foam panels sized for standard garage door sections. They press-fit or clip into the panel recesses — no adhesive, no mess, no permanent commitment.
Best for: Attached garages, homeowners who want a clean look and maximum R-value.
Our Top Pick: Owens Corning Garage Door Insulation Kit — vinyl-faced fiberglass panels, R-8 rated, fits standard single-car doors up to 9 ft. Around $150.
Option B: Fiberglass Batt Insulation
R-value: R-11 to R-15 Cost: $30–$60 in materials
Higher R-value than foam kits, but requires cutting batts to fit each panel and securing them with tape or backer board. Messier to install, and fiberglass requires gloves and a dust mask.
Best for: Detached garages where maximum insulation matters more than looks.
Option C: Reflective Foil Insulation
R-value: R-3 to R-5 (reflective, not conductive) Cost: $40–$80
Thin, lightweight, easy to cut. Works best in hot climates by reflecting radiant heat — less effective as thermal insulation in cold climates. Often used as a secondary layer over foam.
Best for: Sun-belt states (Texas, Arizona, Florida) where summer heat is the bigger enemy.
| Material | R-Value | Install Time | Mess | Best Climate |
|---|---|---|---|---|
| Foam panel kit | R-4 to R-8 | 2–3 hrs | Low | Cold winters |
| Fiberglass batt | R-11 to R-15 | 3–5 hrs | High | Any |
| Reflective foil | R-3 to R-5 | 2–3 hrs | Low | Hot summers |
Step 3: Install the Insulation Panels
The instructions below cover the foam panel kit method — the approach that works for most homeowners.
Cut Panels to Size (If Needed)
Lay the foam panel flat on a hard surface. Mark your measured dimensions with a marker and a straight edge. Score with a utility knife in 2–3 firm passes, then snap cleanly along the score line. Don’t try to cut all the way through in one pass — the score-and-snap method gives a cleaner edge.
⚠️ Most kits include panels pre-cut for standard sizes. If your measurements match the kit specs, you may not need to cut anything.
Insert Panels Into Door Sections
Starting from the bottom panel, press the foam panel into the recess. Most kits use one of two retention methods:
- Press-fit (friction): Panel is slightly oversized and holds by tension. Press firmly from the center outward.
- Retainer clips: Small plastic clips screw into the door frame and hold a rod that pins the panel in place. Takes 5 extra minutes per panel but is more secure.
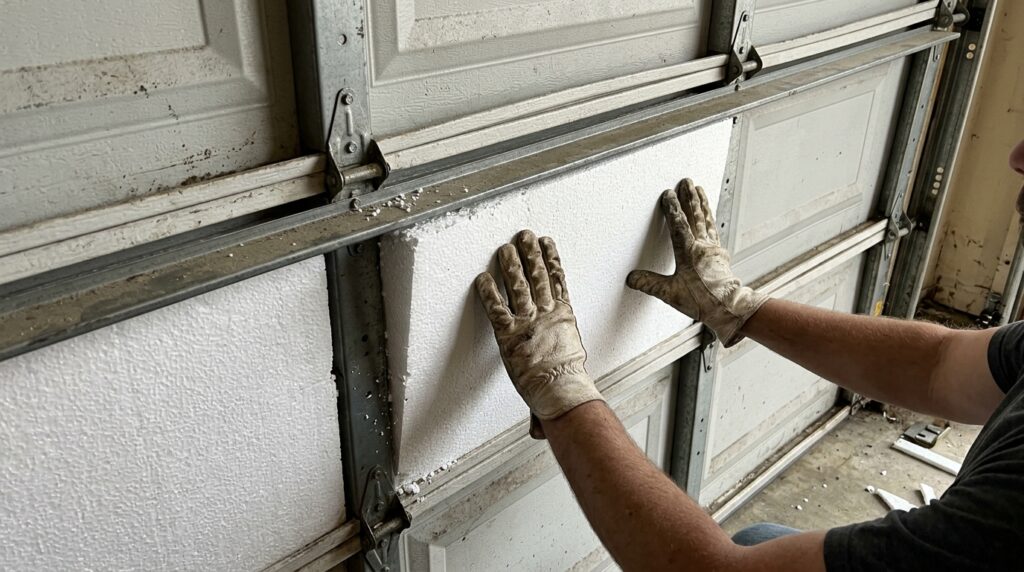
Work your way up panel by panel. The top panel often requires the most trimming due to window inserts or hardware.
Seal the Edges (Optional but Recommended)
Run foil tape along the perimeter of each panel where it meets the door frame. This isn’t strictly necessary, but it prevents air infiltration around the edges and keeps panels from shifting over time.
Step 4: Check Door Balance After Insulating
This step is critical and most guides skip it.
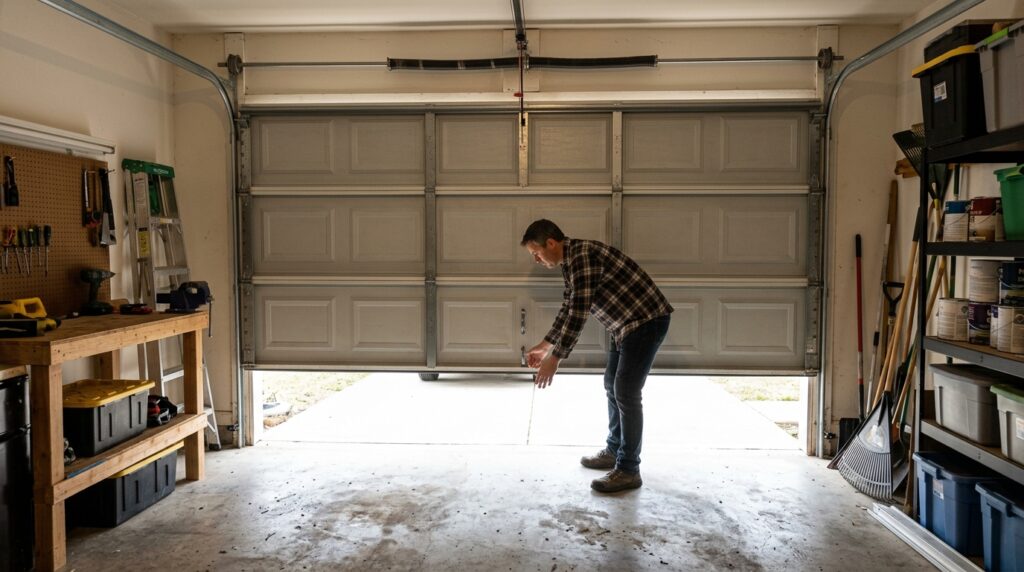
Garage door springs are calibrated for the weight of the door. Foam insulation adds 5–10 lbs to a single-car door. Fiberglass batts can add 20–30 lbs. If you add too much weight, your garage door opener will strain, and the door may not stay open when lifted manually.
How to test:
- Disconnect the opener (pull the red emergency cord)
- Manually lift the door to waist height and let go
- It should stay in place. If it falls, the springs need adjustment.
Spring adjustment is not a DIY task — garage door springs are under extreme tension and dangerous to adjust without training. If your door fails the balance test after insulating, call a garage door technician. A spring adjustment typically costs $75–$150.
If you’re using a foam kit (lightweight), you’re very unlikely to have a balance issue. This matters more if you go with fiberglass batts.
Step 5: Don’t Forget the Garage Door Bottom Seal
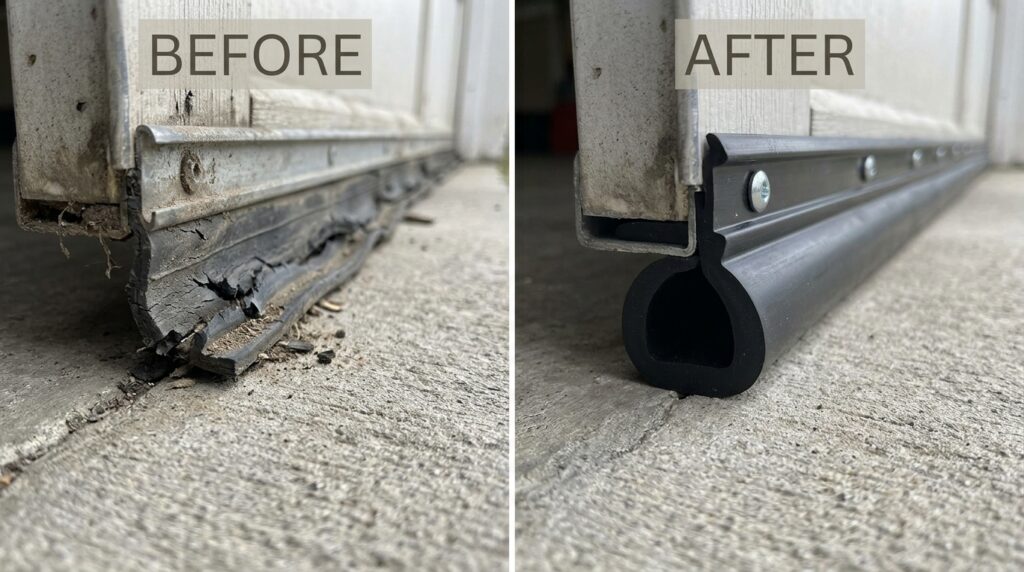
Insulating the panels addresses heat loss through the door itself. But if your bottom seal (the rubber or vinyl strip along the floor) is cracked, compressed, or missing, cold air pours in around the edges regardless.
While you have the door open for insulation, check the bottom seal. If it’s worn, replace it — it’s a $15–$30 fix and takes 20 minutes.
Our Pick: Clopay Vinyl Bottom Weather Seal — universal fit, cuts to length with scissors. Under $25.
If you want to go further, check out our guide on how to weatherstrip a door — the same principles apply to the side and top gaps of your garage door frame.
How Much Will It Actually Help?
Realistic expectations matter here. Insulating a garage door is not the same as insulating a wall.
- Attached garage: You’ll notice the difference. The wall between your garage and living space loses heat faster when the garage is freezing. Most homeowners report a 3–5°F increase in garage temperature per every 10°F outside, which reduces how hard your HVAC works on shared walls.
- Detached garage (workshop or hobby space): Insulation alone won’t make it comfortable in deep winter without a heat source — but it will make a small space heater far more effective, since you’re retaining the heat you generate instead of losing it instantly.
The ROI on a $75 foam kit versus reduced heating costs is real but modest — most estimates put it at $50–$100/year in energy savings for an attached garage in a cold climate. The bigger value for many homeowners is comfort: a garage that’s 45°F instead of 25°F is a different workspace.
Frequently Asked Questions
Does insulating a garage door actually make a difference? Yes — especially for attached garages. An uninsulated steel door has an R-value close to R-0.5. Even a basic foam kit brings it to R-6 or higher. You’ll notice the garage staying warmer longer after the sun hits it, and less cold bleeding into adjacent rooms. The difference is most obvious in climates that see sustained temperatures below 30°F.
Will insulation panels affect how my garage door opens? A foam panel kit adds minimal weight (5–10 lbs for a full door) and should not affect opener performance if your system is in good shape. After installing, manually test the door balance before reconnecting the opener. If you plan to use heavier fiberglass batts, weigh the material before installing and compare to your opener’s rated door weight capacity.
Can I insulate a garage door with windows? Yes. Work around the window panels — cut insulation panels to fit the non-window sections and leave the window panels bare, or buy a kit that includes cut-outs. Most kits accommodate standard window placements.
What R-value do I need for a garage door? For most attached garages in cold-weather states, aim for R-6 to R-10. Higher is better but the law of diminishing returns kicks in quickly — the difference between R-10 and R-18 is much smaller than the jump from R-0 to R-6. Spend your money on air sealing (bottom seal, side gaps) before chasing higher R-value foam.
Can I insulate a one-piece garage door (old tilt-up style)? Yes, but it’s less clean. Tilt-up doors don’t have sectional panel recesses, so you’ll need to adhere insulation directly to the surface using construction adhesive or double-sided foam tape. Reflective foil works well here since it’s thin and lightweight.
The Bottom Line
Insulating your garage door is one of those projects with zero downside — it costs under $100, takes an afternoon, and you’ll feel the difference the first cold night. Start with a foam panel kit if you want the easiest path. Add a new bottom seal while you’re at it.
If you’re doing a full winter prep this year, pair this with our room-by-room winterizing checklist — the garage section there will point you back here.
Got questions about your specific door type? Leave a comment below.
Related posts: