
This post contains affiliate links. If you buy through our links, we may earn a small commission at no extra cost to you.
The window for winterizing a house is September through October in most of the northern US — before the first freeze and before heating systems are running full time. Miss that window and you’re dealing with frozen pipes, sky-high energy bills, and drafts that no amount of extra layers can fix.
The tasks aren’t complicated. Most take under an hour each. Done together in a weekend afternoon, they protect your home through winter and typically pay for themselves in energy savings alone.
Quick answer: The highest-impact winterizing tasks: seal gaps around doors and windows with weatherstripping and caulk, insulate exposed pipes in unheated spaces, replace your furnace filter and schedule a tune-up, add attic insulation if you’re below R-38, disconnect garden hoses, and set your thermostat to 68°F when home and 60°F when away.
1. Windows and Doors
Air leaks around windows and doors account for 25–30% of heating energy loss in most homes. Sealing them is the highest-return winterizing task you can do.
Check for drafts. Hold a lit candle or incense stick near window and door frames on a windy day. Flickering flame = air leak. Common leak points: where the frame meets the wall, around lock mechanisms, and at the bottom of exterior doors.
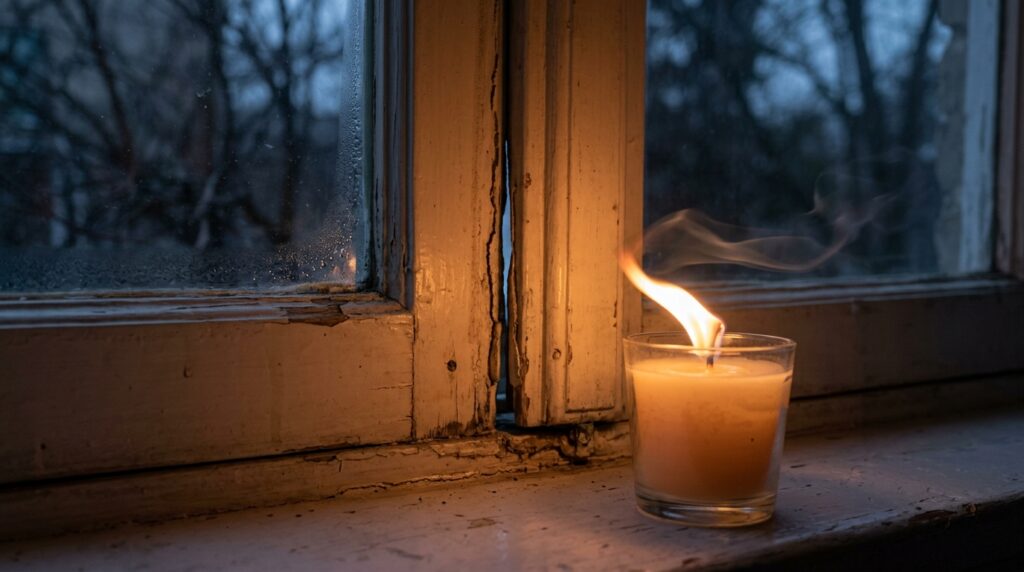
Replace worn weatherstripping. Weatherstripping around door frames compresses and deteriorates over time. If you can feel cold air or see daylight around a closed door, the weatherstripping needs replacing. See our full guide: How to Weatherstrip a Door.
🔗 Our Top Pick: Sello-Foam Door Weatherstrip Seal (Amazon)
Caulk window frames. Check the exterior caulk around window frames where they meet the siding. Cracked or missing caulk lets cold air and moisture in. Apply a paintable exterior caulk on a day above 40°F — caulk doesn’t cure properly in cold temperatures.
Add door sweeps. The gap under exterior doors is one of the biggest sources of heat loss. A door sweep — a brush or rubber seal that attaches to the bottom of the door — seals it for under $20.
Consider window insulator film. For older single-pane windows, interior window insulator film (plastic film applied over the window frame with double-sided tape and shrunk tight with a hair dryer) adds a meaningful insulation layer for about $5 per window.
💡 Pro tip: The candle test works, but a better tool is an infrared thermometer — point it at the wall around windows and doors. Cold spots show up immediately as temperature drops of 5°F+ compared to the surrounding wall.
2. Plumbing and Pipes
Frozen pipes are one of the most expensive winter home emergencies — a burst pipe can cause thousands of dollars in water damage. Prevention costs under $30.
Disconnect and drain garden hoses. This is the single most important pipe winterizing task. A hose left connected holds water against the spigot — when it freezes, the ice expands back into the pipe inside the wall. Disconnect all hoses, drain them, and store indoors.
Shut off and drain exterior hose bibs if possible. If your home has interior shutoff valves for exterior spigots (common in newer homes), close them and open the exterior faucet to drain any remaining water from the line.
Insulate pipes in unheated spaces. Pipes in the garage, crawl space, and against exterior walls are vulnerable to freezing. Foam pipe insulation slips over the pipe and tapes closed — costs about $1 per foot. Focus on any pipe that’s in an unheated space or against an exterior wall.
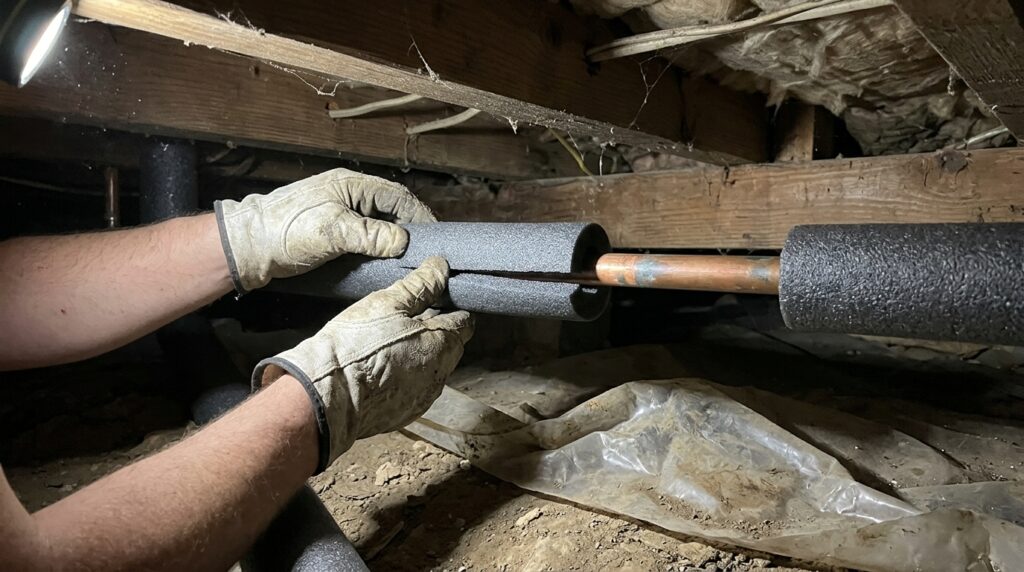
🔗 Our Top Pick: 2 inch x 14 ft Pipe Insulation, Outdoor Pipe Insulation Wrap (Amazon)
Know where your main water shutoff is. If a pipe does freeze and burst, you need to shut off the main water supply immediately. Make sure every adult in the household knows where the shutoff is and how to operate it.
⚠️ Never use an open flame to thaw a frozen pipe. Use a hair dryer on low heat, moving it continuously. If you can’t locate the freeze or the pipe has already burst, call a plumber immediately.
3. Heating System
Your heating system works harder in winter than any other time of year. A few hours of maintenance before the season starts means fewer breakdowns, lower energy bills, and better air quality.
Replace the furnace filter. A clogged filter makes the furnace work harder, reduces efficiency, and circulates dust and allergens. Replace it at the start of heating season and again midwinter if you run the heat heavily. Use a MERV 8–11 filter for good filtration without excessive airflow restriction.
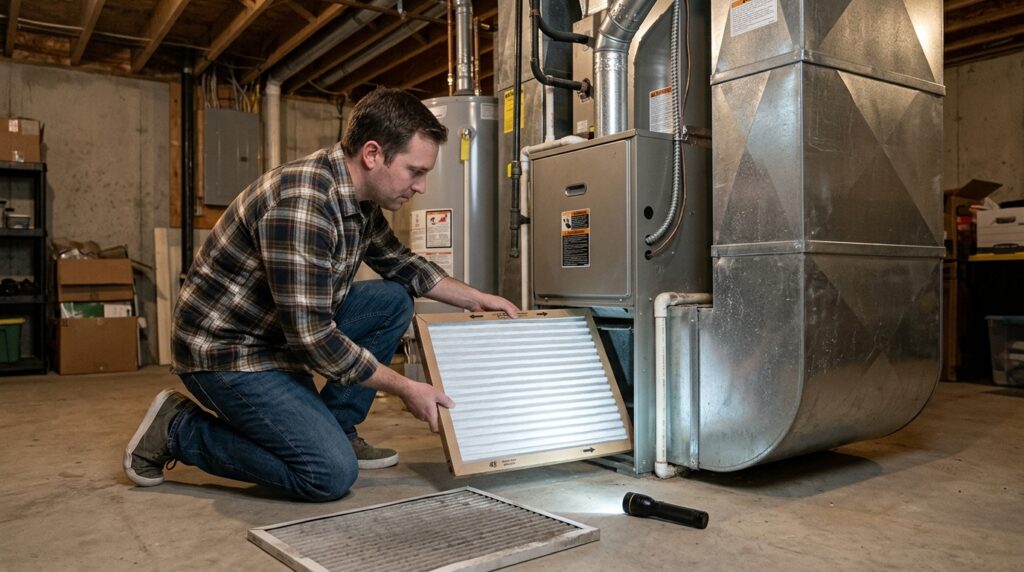
Schedule a professional tune-up. An annual furnace inspection (typically $80–$150) catches developing problems before they become emergency repairs in January. The technician cleans burners, checks heat exchangers, verifies carbon monoxide levels, and ensures safe operation.
Test your thermostat. Set it to heat mode and raise the temperature above the current room temperature. The furnace should kick on within a minute or two. If it doesn’t, check the breaker, check the filter (a clogged filter can trip the furnace’s safety shutoff), and check the pilot light on older systems.
Install a programmable or smart thermostat. Setting back the temperature 7–10°F for 8 hours a day (while sleeping or away) saves up to 10% on annual heating bills. A programmable thermostat pays for itself in one heating season.
🔗 Our Top Pick: Honeywell Home X2P Programmable Thermostat, White (Amazon)
Check and clean vents and registers. Vacuum dust from all supply and return vents. Move furniture that’s blocking vents — even partially blocked vents reduce system efficiency and create uneven heating.
Test carbon monoxide detectors. CO detectors should be tested monthly and replaced every 5–7 years. The start of heating season is a good annual reminder. CO from a cracked heat exchanger is invisible and odorless — detectors are the only warning.
4. Attic and Insulation
Heat rises. If your attic is under-insulated, you’re literally paying to heat the sky. Attic insulation is the highest-ROI energy upgrade in most older homes.
Check your current insulation level. Go into the attic and look at the insulation depth. The US Department of Energy recommends R-38 to R-60 for most of the northern US (about 10–15 inches of blown fiberglass or cellulose). If you can see the joists, you definitely need more insulation.
Seal attic bypasses first. Before adding insulation, seal the air leaks where warm air escapes from the living space into the attic — around recessed lights, plumbing and electrical penetrations, and the attic hatch. Foam sealant and fire-rated caulk handle most of these. Sealing bypasses is more impactful than adding insulation over leaky bypasses.
Check the attic hatch. The attic access hatch is often uninsulated — a significant heat loss point. Add weatherstripping around the frame and an insulated cover over the hatch (a foam board cut to size works well).
💡 Pro tip: If you’re adding blown-in insulation, this is typically a job for a professional or a rented blower from Home Depot. DIY blown-in insulation is possible but messy — wear a respirator and eye protection.
5. Exterior and Roof
A few exterior tasks before winter prevent expensive damage from ice, moisture, and freeze-thaw cycles.
Clean the gutters. Gutters clogged with fall leaves cause ice dams — ice that forms at the roof edge and backs water up under shingles. Clean gutters in late fall after leaves have dropped. Flush with a hose to verify they drain freely.
Check the roof for damaged shingles. From the ground with binoculars, look for missing, curled, or cracked shingles. Any damaged area that gets snow and ice on it can leak. Address repairs before winter — roofing in January is expensive and difficult.
Trim branches near the house. Heavy snow and ice loads can bring down branches. Any branch within falling distance of the roof, windows, or power lines should be trimmed before winter.
Caulk exterior penetrations. Check the caulk around where pipes, cables, and vents exit the house. These are common air and moisture infiltration points. Reapply exterior caulk wherever the existing seal is cracked or missing.
Drain and store garden equipment. Drain and fog the engine on lawn mowers and other gas-powered equipment, or run them dry. Store behind a weathertight door. Gasoline left in engines over winter gums up carburetors.
6. Garage and Basement
Insulate the garage door. An uninsulated garage door is a major source of heat loss, especially for attached garages. Garage door insulation kits (foam panels that attach to the inside of the door) cost $50–$100 and noticeably reduce heat loss in attached garages.
Check the garage door weatherstripping. The rubber seal along the bottom of the garage door and along the sides deteriorates over time. Replace it if it’s cracked, compressed, or no longer sealing. This prevents cold air, pests, and moisture from entering.
Inspect the basement for moisture. Before winter seals everything up, check the basement walls and floor for water stains, efflorescence (white mineral deposits), or active moisture. Address any water infiltration before winter — freeze-thaw cycles worsen foundation cracks.
Insulate basement rim joists. The rim joist — the perimeter framing at the top of the foundation wall — is one of the most common heat loss points in older homes. Foam board insulation cut to fit and sealed with spray foam is an effective DIY fix.
Winterizing Checklist
Windows & Doors
☐ Test for drafts around all windows and exterior doors
☐ Replace worn weatherstripping on exterior doors
☐ Caulk window frames (exterior)
☐ Install or replace door sweeps
☐ Apply window insulator film to single-pane windows if needed
Plumbing
☐ Disconnect and drain all garden hoses
☐ Shut off and drain exterior hose bibs
☐ Insulate pipes in unheated spaces
☐ Locate and test main water shutoff valve
Heating System
☐ Replace furnace filter
☐ Schedule professional furnace tune-up
☐ Test thermostat — heat mode
☐ Install programmable thermostat if not already present
☐ Clean and unblock all vents and registers
☐ Test all carbon monoxide detectors
Attic & Insulation
☐ Check attic insulation depth — target R-38 minimum
☐ Seal air bypasses around lights, pipes, and penetrations
☐ Insulate and weatherstrip attic hatch
Exterior & Roof
☐ Clean gutters after leaves drop
☐ Inspect roof for damaged shingles
☐ Trim branches near house or power lines
☐ Caulk exterior penetrations
☐ Drain and store lawn equipment
Garage & Basement
☐ Add insulation to garage door if attached garage
☐ Replace garage door weatherstripping if worn
☐ Inspect basement for moisture or cracks
☐ Insulate basement rim joists
Frequently Asked Questions
When should I winterize my house?
September and October are ideal for most of the northern US — before the first freeze and before heating systems are running continuously. The most time-sensitive tasks are disconnecting garden hoses (before the first frost) and scheduling a furnace tune-up (before peak-season demand makes appointments scarce). Complete the full checklist by mid-October.
How much does it cost to winterize a house?
Basic winterizing — weatherstripping, caulk, pipe insulation, furnace filter, and a furnace tune-up — runs $150–$400 for most homes. If you add attic insulation, the cost increases to $500–$2,000 depending on the area and depth needed, but attic insulation typically pays for itself in energy savings within 3–5 years.
What temperature should I keep my house in winter?
The Energy Department recommends 68°F when home and awake, and 60°F when sleeping or away. Each degree you lower the thermostat saves about 1% on heating costs. Never let the temperature drop below 55°F in an occupied home — pipes in exterior walls can freeze at temperatures below 20°F outdoors even with interior temps at 60°F.
How do I prevent pipes from freezing?
The three most effective measures: disconnect garden hoses, insulate pipes in unheated spaces, and keep the heat set to at least 55°F even when away. During extreme cold snaps (below 10°F), open cabinet doors under sinks on exterior walls to let warm air circulate around pipes, and let faucets drip slightly to relieve pressure if pipes do start to freeze.
Do I need to winterize if I live in a mild climate?
Even mild climates benefit from some winterizing — primarily sealing drafts, servicing the HVAC system, and cleaning gutters. The pipe-related tasks are less critical if temperatures stay above freezing, but a single unexpected freeze can burst uninsulated pipes. The energy-saving tasks (weatherstripping, thermostat programming) are worthwhile regardless of climate.
The Bottom Line
Winterizing a house is a one-weekend project that protects your home for the entire season. The tasks are straightforward and the materials are inexpensive — the return comes in energy savings, avoided repairs, and the comfort of a home that holds heat properly.
Start with the high-impact items: seal drafts around doors and windows, disconnect garden hoses, replace the furnace filter, and schedule a tune-up. The rest of the checklist fills in from there. Do it once in September or October and your home is ready for whatever winter brings.
Related posts (internal links):