
This post contains affiliate links. If you buy through our links, we may earn a small commission at no extra cost to you.
Painting kitchen cabinets is one of the highest-return home improvement projects you can do — a full cabinet repaint costs $200–$400 in materials versus $3,000–$8,000 for new cabinets. Done right, the result is indistinguishable from new.
Done wrong, it peels, chips, and looks worse than unpainted wood within a year. The difference is almost entirely in prep — cleaning, deglossing, and priming properly. The painting itself is straightforward once the surfaces are ready.
Here’s the complete process.
Quick answer: Remove all doors, drawers, and hardware. Clean with TSP or a degreaser, then degloss. Sand lightly with 150-grit, fill any dents with wood filler. Apply a shellac-based primer (Zinsser BIN). Paint with a cabinet-specific alkyd or waterborne alkyd paint (Benjamin Moore Advance) using a quality brush and foam roller. Apply 2–3 thin coats, sanding lightly between coats with 220-grit.
What You’ll Need
- TSP cleaner or heavy-duty degreaser — for cleaning grease and grime
- Liquid deglosser (liquid sandpaper) — for scuffing glossy surfaces
- 150-grit and 220-grit sandpaper — for sanding between coats
- Wood filler or spackling — for dents and dings
- Shellac-based primer (Zinsser BIN) — best adhesion on cabinets
- Cabinet-grade paint — Benjamin Moore Advance or Sherwin-Williams Emerald Urethane
- Quality angled brush — Purdy 2.5″ for detail work
- 4″ foam roller — for flat panel surfaces
- Screwdriver and small bags — for hardware removal and labeling
- Drop cloths and painter’s tape
- Sanding block — for flat surfaces
🔗 Our Top Pick: Zinsser BIN Shellac-Based Primer (Amazon)
🔗 Our Top Pick: Purdy XL Glide Angular Trim Brush (Amazon)
🔗 Our Top Pick: Klean-Strip Liquid Deglosser (Amazon)
💡 Pro tip: Benjamin Moore Advance and Sherwin-Williams Emerald Urethane are waterborne alkyd paints — they apply like latex but cure to a hard, durable finish like oil. Available at paint stores, not typically on Amazon. Get a quart for doors and a gallon for boxes.
Step 1: Remove Doors, Drawers, and Hardware
Label everything before removing. Number each door and its corresponding cabinet with painter’s tape and a marker. Cabinets that look identical often have slightly different sizes — you’ll thank yourself during reassembly.
Remove all hardware. Take off hinges, knobs, and pulls. Put the screws for each door in a labeled zip-lock bag taped to that door. This takes 20 minutes and saves hours of confusion later.
Remove doors and drawers. Set doors flat on sawhorses or a workbench for painting — never paint them vertically or paint will sag and run. Drawer fronts can be removed from the drawer box for easier painting.
Fill hinge holes on doors you’re rehanging with new hardware. If you’re changing from old-style to concealed hinges, you may need to fill old holes with wood filler before painting.
💡 Pro tip: Photograph the inside of each cabinet before removing hardware — especially if hinges have multiple adjustment screws. You’ll have a reference for reassembly without guessing.
Step 2: Clean and Degloss the Surfaces
This is the most important step for adhesion. Kitchen cabinets accumulate years of grease, cooking oils, and soap residue — paint won’t bond to any of it.
Clean with TSP or degreaser. Mix TSP (trisodium phosphate) per package directions, or use a dedicated kitchen degreaser like Krud Kutter. Wipe every surface that will be painted — inside and out of cabinet boxes, both sides of doors, all edges. Rinse with clean water and let dry completely.
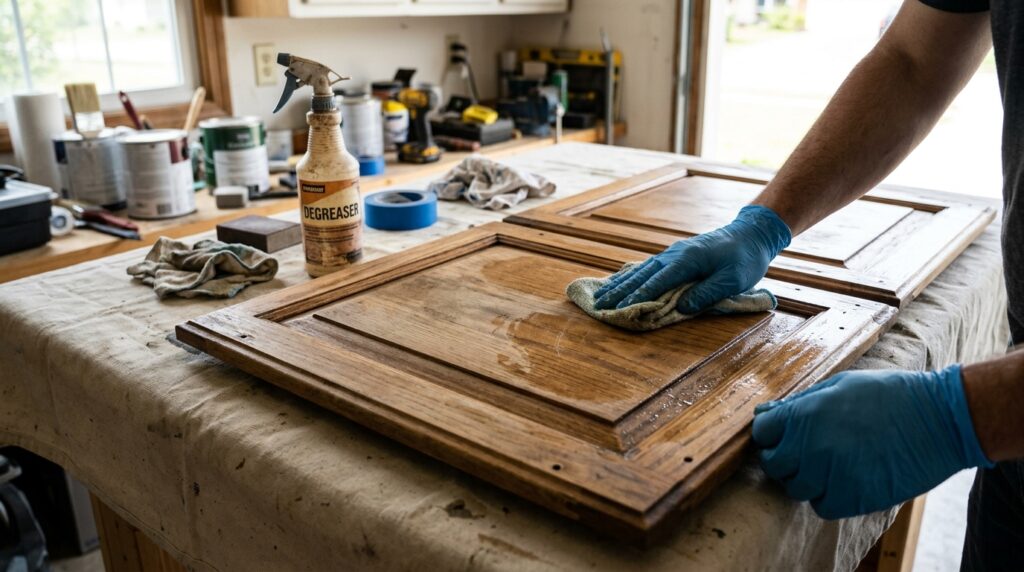
Apply liquid deglosser. Liquid deglosser (also called liquid sandpaper) chemically scuffs glossy surfaces to improve paint adhesion without mechanical sanding. Apply with a rag in the direction of the grain, let sit per package directions (usually 5–10 minutes), then wipe off. Work in a ventilated area — it’s solvent-based.
⚠️ Don’t skip the degreasing step even if cabinets look clean. Cooking grease is invisible once dried but completely prevents paint adhesion. One missed spot means a chip or peel within months.
Step 3: Sand and Fill
Sand with 150-grit. Lightly sand all surfaces with 150-grit sandpaper on a sanding block. You’re not trying to remove the existing finish — just scuffing it for better primer adhesion. Sand in the direction of the grain. On flat panel doors, a random orbital sander saves significant time.
Fill dents and dings. Apply wood filler or lightweight spackling to any dents, scratches, or holes. Let dry completely, then sand smooth with 150-grit. Repeat if the filler shrinks after drying.
Wipe off all dust. Use a tack cloth or a damp rag to remove all sanding dust. Any dust left on the surface will show through the paint as texture bumps.
Caulk gaps. If there are visible gaps between cabinet frames and walls, apply a thin bead of paintable caulk and smooth with a wet finger. This gives the finished look a built-in appearance.
| Surface condition | Action needed |
| Solid wood or MDF in good condition | Degloss + 150-grit sand + prime |
| Laminate or thermofoil cabinets | Degloss thoroughly + shellac primer — adhesion is harder |
| Previously painted cabinets | Degloss + sand + spot-prime bare areas + full prime coat |
| Cabinets with peeling veneer | Repair veneer or reconsider painting — paint won’t fix structural problems |
Step 4: Prime
Primer is non-negotiable for cabinet painting. It seals the wood, improves adhesion, and prevents tannin bleed-through (the yellowish staining that happens when paint is applied directly to wood, especially oak).
Use shellac-based primer for best results. Zinsser BIN is the industry standard for cabinet painting. It sticks to virtually any surface including glossy laminate, dries in 45 minutes, and blocks tannins, knots, and stains completely. It’s stinkier than water-based primers — ventilate well and use a respirator.
Apply with a brush and foam roller. Use the angled brush for recessed panel edges and detail areas. Use the foam roller for flat surfaces — it leaves a smoother finish than a brush alone. Apply one coat, let dry 45 minutes to 1 hour.
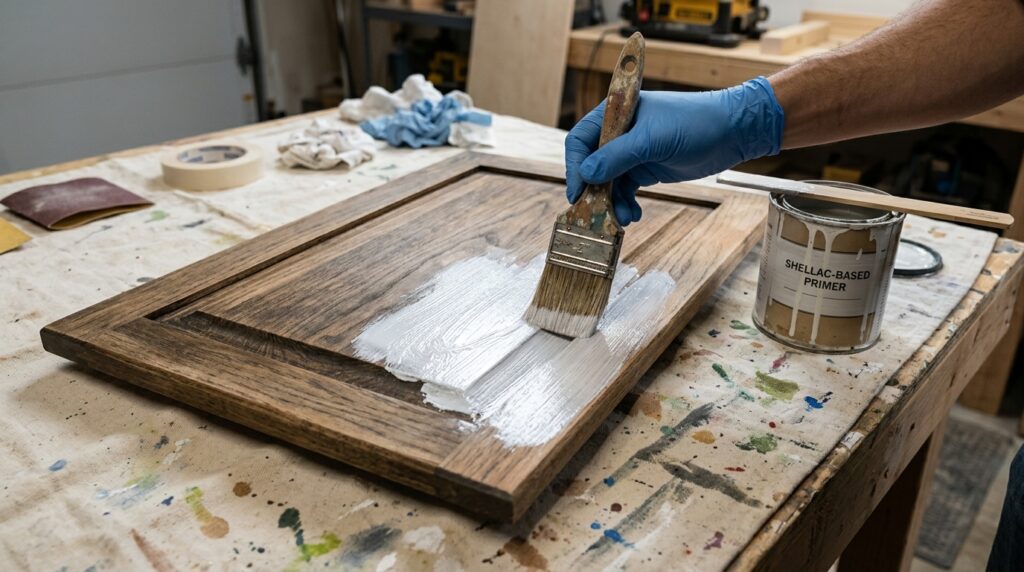
Sand lightly after primer dries. Once the primer is fully dry, sand with 220-grit sandpaper to knock down any texture or brush marks. Wipe off dust with a tack cloth.
Spot-prime any bare wood areas. After the first prime coat, you may see areas where the primer raised the grain or where bare wood is still showing. Spot-prime these areas and sand again before painting.
⚠️ Don’t use a water-based primer on bare wood cabinets — it raises the grain and requires significantly more sanding. Shellac primer seals better and dries faster. For laminate cabinets, shellac primer is the only primer with reliable adhesion.
Step 5: Paint
Choose the right paint. For kitchen cabinets, use a cabinet-grade alkyd or waterborne alkyd paint — not standard wall paint. Benjamin Moore Advance and Sherwin-Williams Emerald Urethane are the two most recommended options by professional painters. They level out brush marks as they cure, resulting in a smooth, hard finish.
Apply thin coats. Thin coats are the key to a smooth finish. Two or three thin coats look far better than one thick coat, which sags, drips, and takes forever to dry. Load your brush or roller lightly and apply even, thin coverage.
Paint in the right order: interior cabinet boxes first, then doors and drawer fronts. On doors: paint the recessed panel first with the brush, then the rails (horizontal), then the stiles (vertical). This prevents lap marks at intersections.
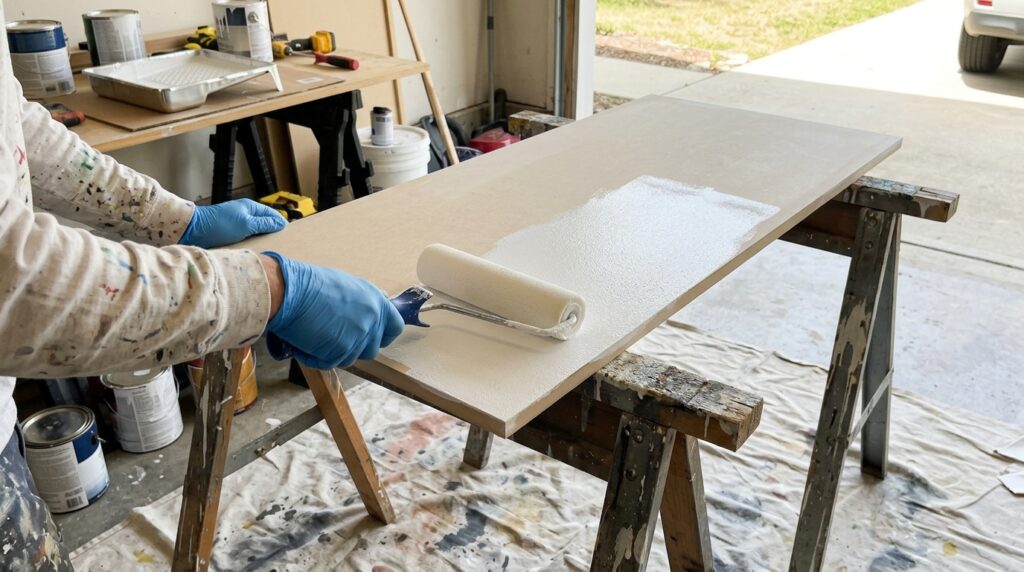
Use a brush for detail areas, foam roller for flat panels. The foam roller minimizes texture on large flat surfaces. Follow up with a light brush pass in the direction of the grain to eliminate roller stipple — this technique is called ‘tipping off.’
Sand between coats with 220-grit. After each coat fully dries (2–4 hours for Advance), sand lightly with 220-grit and wipe off dust before applying the next coat. This removes any dust nibs, brush marks, or texture and gives subsequent coats better adhesion.
Apply 2–3 coats total. Most cabinets need 2 coats of paint after primer for full, even coverage. Dark-to-light or light-to-dark color changes may need 3.
💡 Pro tip: Paint doors laying flat on sawhorses — never standing upright. Gravity pulls wet paint downward and causes drips on vertical surfaces. Paint one side, let dry 24 hours, flip and paint the other side.
Step 6: Reassemble
Wait for full cure before rehanging doors. Benjamin Moore Advance takes 30 days to fully cure — during this time the paint is still hardening and can be damaged by friction. Wait at least 24–48 hours before rehanging doors, and avoid rubbing or stacking painted surfaces for 2 weeks.
Rehang doors using your labels. Match each door to its labeled cabinet. Even slight size differences between doors are noticeable when mismatched.
Install new hardware last. If you’re updating hardware, do it after the doors are hung and adjusted. Use a hardware template (a cardboard jig) to ensure consistent placement across all doors and drawers.
Adjust hinges. European-style concealed hinges have three adjustment screws — vertical, horizontal, and depth. Adjust until each door is level and the gap between doors is even.
Common Mistakes to Avoid
Skipping the degreasing. The #1 cause of cabinet paint failure. Grease from cooking is invisible but completely prevents adhesion. Clean thoroughly even if cabinets look clean.
Using the wrong paint. Standard wall paint on cabinets chips and scuffs within months — it’s not formulated for the friction and moisture of a kitchen environment. Use a cabinet-specific paint.
Skipping primer. Paint applied directly to wood yellows, peels, and shows tannin bleed-through. Shellac primer is not optional — it’s the foundation of a lasting paint job.
Applying thick coats. Thick coats sag, drip, and take days to dry. Three thin coats dry faster and look better than one thick one.
Not sanding between coats. Each coat picks up dust and has minor imperfections. Light sanding with 220-grit between coats is what gives cabinets that smooth, factory look.
Reassembling too soon. Stacking or rubbing freshly painted surfaces before they cure damages the finish. The paint may look dry but isn’t hard yet. Wait at least 48 hours before rehanging and 2 weeks before the finish is fully durable.
Frequently Asked Questions
How long does it take to paint kitchen cabinets?
A full kitchen cabinet paint job takes 3–5 days total — not because painting takes that long, but because of drying time between steps. Day 1: remove, clean, degloss, sand. Day 2: prime. Day 3: first coat of paint. Day 4: second coat. Day 5: reassemble. You can compress the timeline if you have good ventilation and fast-drying products.
Can I paint cabinets without sanding?
You can skip mechanical sanding if you use a liquid deglosser — it chemically scuffs the surface. But you can’t skip surface prep entirely. Deglossing is mandatory; it’s just a question of whether you do it chemically or mechanically. For the smoothest results, do both: degloss first, then light sanding.
What’s the best paint color for kitchen cabinets?
White and off-white remain the most popular choices — they’re timeless, make kitchens feel larger, and work with almost any countertop. Benjamin Moore White Dove (OC-17) and Sherwin-Williams Alabaster are both widely used. For contrast, navy blue (SW Naval, BM Hale Navy) and sage green are trending. Whatever color you choose, use the same brand’s cabinet paint — the formulas are matched.
How durable is painted cabinet finish?
A properly painted cabinet using shellac primer and a cabinet-grade alkyd paint lasts 8–15 years with normal use. The durability depends almost entirely on prep: degreased surface + shellac primer + quality paint = very durable. Skipping any of those steps reduces lifespan significantly. Annual touch-ups on high-wear areas (around handles) extend the life further.
Should I spray or brush/roll kitchen cabinets?
Spraying gives the smoothest finish but requires equipment, masking everything in the kitchen, and practice to avoid runs. Brush and foam roller gives excellent results with the right technique (tipping off) and is more accessible for DIYers. Most homeowners doing their first cabinet paint job get better results with brush and roller than with a rented sprayer they haven’t used before.
The Bottom Line
Painting kitchen cabinets is a weekend project that can transform the look of your kitchen for a fraction of the cost of replacement. The results depend almost entirely on prep — clean, degloss, sand, and prime properly, and the painting itself is straightforward.
Invest in quality materials: Zinsser BIN primer, a cabinet-grade waterborne alkyd paint, and a good brush. Those three things make the difference between a paint job that lasts a decade and one that starts chipping within a year.
Related posts (internal links):