
This post contains affiliate links. If you buy through our links, we may earn a small commission at no extra cost to you.
Grouting is the step that separates a finished tile job from an unfinished one — and it’s more forgiving than most people expect. The technique matters more than strength or experience: apply it at the right consistency, work in sections, and clean the haze before it hardens.
Whether you’re grouting a bathroom floor, a backsplash, or a shower surround, the process is the same. Here’s exactly how to do it.
Quick answer: Mix grout to a peanut butter consistency, apply with a rubber float held at 45 degrees, pack it firmly into the joints, and remove excess with diagonal strokes. Wait 15–30 minutes, then clean the haze with a damp sponge in circular motions. Let cure 24–72 hours before sealing. Work in small sections — grout dries fast.
What You’ll Need
- Grout (sanded or unsanded — see Section 2)
- Rubber grout float — for applying and packing grout
- Bucket and margin trowel or drill with mixing paddle — for mixing
- Large sponge — for cleaning haze
- Two buckets of clean water — one for rinsing the sponge, one clean
- Grout sealer — applied after curing
- Painter’s tape — to protect adjacent surfaces
- Knee pads and gloves — grout is rough on hands and knees
🔗 Our Top Pick: Mapei Flexcolor CQ Grout (Amazon)
🔗 Our Top Pick: QEP Rubber Grout Float (Amazon)
🔗 Our Top Pick: Aqua Mix Sealer’s Choice Gold Grout Sealer (Amazon)
Choose the Right Grout (Sanded vs. Unsanded)
This is the first decision to get right — using the wrong type causes cracking and poor adhesion.
| Grout type | Joint width | Best for |
| Unsanded grout | Less than 1/8″ (3mm) | Wall tile, glass tile, polished stone — won’t scratch delicate surfaces |
| Sanded grout | 1/8″ to 1/2″ (3–12mm) | Floor tile, most ceramic and porcelain — sand gives strength for wider joints |
| Epoxy grout | Any width | High-moisture areas, commercial use — stain-proof but harder to apply |
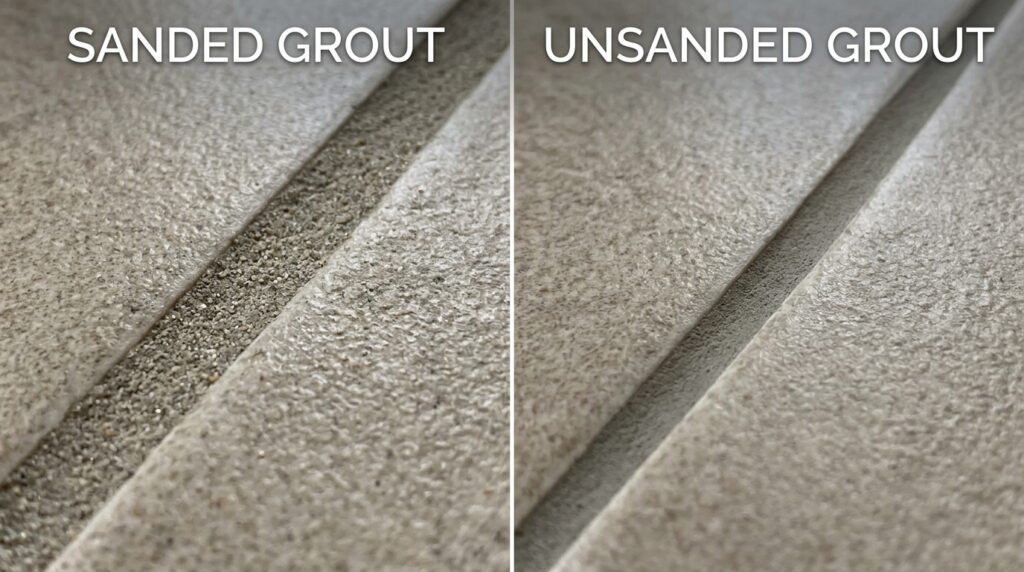
When in doubt: measure your joint width. Under 1/8″ = unsanded. Over 1/8″ = sanded. Using sanded grout in narrow joints causes cracking; using unsanded in wide joints causes shrinkage and cracking.
💡 Pro tip: Check the tile manufacturer’s recommendation for your specific tile. Some natural stone tiles (marble, travertine) require unsanded grout even in wider joints because sand scratches the polished surface.
Step 1: Prepare the Surface
Wait for the tile adhesive to cure. Don’t grout until the tile mortar or adhesive has fully cured — typically 24 hours for thin-set mortar. Walking on or grouting over uncured adhesive shifts tiles and ruins the layout.
Remove tile spacers. Pull out all plastic spacers with needle-nose pliers or a utility knife. Grout won’t bond over plastic.
Clean the joints. Use a utility knife or grout saw to remove any dried adhesive that has squeezed up into the joints. The joints should be clean and at least 2/3 of the tile depth — shallow joints hold grout poorly.
Dampen the joints. Lightly mist the tile surface and joints with water. This prevents the dry tile from pulling moisture out of the grout too quickly, which causes cracking. Don’t soak — just dampen.
Tape off adjacent surfaces. Apply painter’s tape along baseboards, tub edges, and any surfaces you don’t want grout on. Grout haze on finished surfaces is harder to remove than tape.
⚠️ Never grout over cracked, hollow-sounding, or loose tiles. Fix tile adhesion problems before grouting — grout holds tiles in place cosmetically but won’t fix a poorly bonded tile.
Step 2: Mix the Grout
Add water to grout — not grout to water. Pour the grout powder into the bucket first, then add water slowly while mixing. This gives you better control over consistency.
Target consistency: peanut butter. Mix until the grout is smooth, lump-free, and holds its shape when you scoop it. Too wet and it shrinks and cracks as it dries. Too dry and it won’t pack into the joints properly.
Let it slake. After initial mixing, let the grout sit for 5–10 minutes without touching it. Then mix again briefly. This ‘slaking’ period allows the polymers to fully activate and gives you a smoother, more workable mix.
Mix only what you can use in 20–30 minutes. Grout has a working time of about 30 minutes before it starts to stiffen. Mix small batches — you can always mix more.
💡 Pro tip: Use a margin trowel or a drill with a mixing paddle for consistent results. Mixing by hand works but leaves lumps that show up as voids in the finished joints.
Step 3: Apply the Grout
Work in sections of 3–4 square feet. Don’t spread grout over the entire floor at once — it will harden before you can clean it. Work in manageable sections, especially for your first time.
Load the float. Scoop grout onto the rubber float with a margin trowel. You want a generous amount — the float should be about half covered.
Apply at a 45-degree angle. Hold the float at roughly 45 degrees to the tile surface and push grout diagonally across the joints. The diagonal motion forces grout into the joints rather than dragging it back out.
Pack firmly. Apply firm pressure as you push — you want the joints completely packed with no voids or air pockets. Run the float in multiple directions over each joint to ensure full coverage.
Remove excess. Once the joints are packed, hold the float at a steeper angle (about 80 degrees) and drag it diagonally across the tile to scrape off excess grout from the surface. The joints should be slightly overfilled — they’ll settle as they dry.
💡 Pro tip: Keep a bucket of clean water and a damp sponge nearby. Wipe your float periodically to prevent grout buildup on the rubber, which reduces effectiveness.
Step 4: Clean the Haze
This is the most time-sensitive step. Grout haze — the cloudy film left on tile after grouting — must be cleaned before it fully hardens.
Wait 15–30 minutes after applying. Let the grout firm up slightly before cleaning. If you clean too early, you pull grout out of the joints. Too late and the haze hardens into a film that’s very difficult to remove.
Test a small area first. Press the grout lightly with your finger — it should feel firm but not rock-hard. If it still feels soft and comes off on your finger, wait 5–10 more minutes.
Use two buckets. Fill one bucket with clean water for rinsing your sponge, and keep a second clean bucket nearby. Change the rinse water frequently — cleaning haze with dirty water just spreads it around.
Wipe in circular motions. Dampen (not soak) a large grout sponge and wipe in gentle circular motions. The goal is to remove grout from the tile surface while leaving the joints intact. Rinse and wring the sponge after every 2–3 wipes.
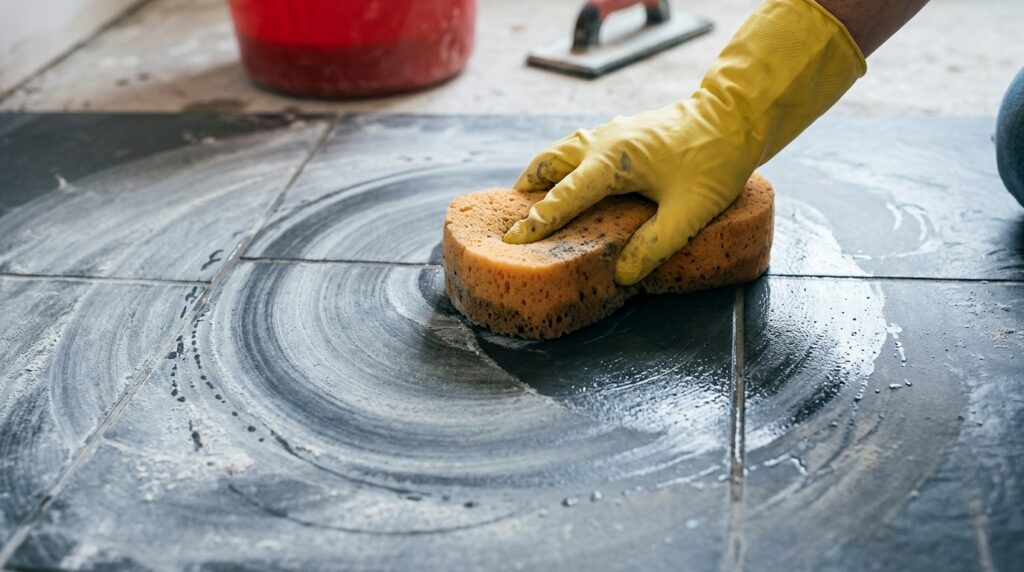
Do a final diagonal wipe. After the bulk of the haze is removed, do a final pass with a barely damp sponge in diagonal strokes to smooth the joint edges and remove any remaining film.
Buff dry. Once the haze is cleaned, buff the tile with a dry microfiber cloth to remove any remaining residue and bring out the shine.
⚠️ Don’t use too much water when cleaning haze. Excess water weakens grout by diluting its surface and can cause white efflorescence (a powdery white deposit) as it dries. A barely damp sponge is more effective than a soaking wet one.
Step 5: Seal the Grout
Grout sealer is optional on epoxy grout (which is already non-porous) but essential on sanded and unsanded cement-based grout. Unsealed grout absorbs stains, mold, and moisture — especially in bathrooms and kitchens.
Wait for full cure. Don’t seal until the grout has fully cured — 48–72 hours minimum, longer in humid conditions. Sealing too early traps moisture inside the grout and causes problems.
Apply with a foam brush or applicator bottle. Run the sealer along the grout lines, avoiding the tile surface as much as possible. Wipe off any sealer that lands on tile immediately — it can leave a haze on some tile types.
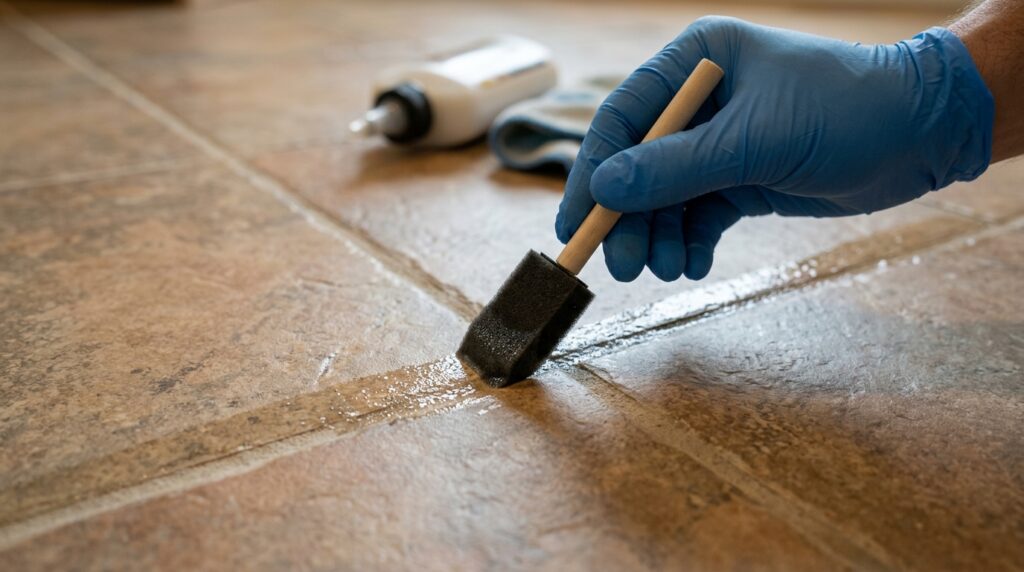
Apply 2 coats. Let the first coat absorb for 5–10 minutes, then apply a second coat. Two thin coats penetrate more effectively than one thick coat.
Test the seal. After 24 hours, drop a few beads of water onto the grout. If they bead up, the seal is working. If they absorb into the grout, apply another coat.
🔗 Our Top Pick: Aqua Mix Sealer’s Choice Gold
💡 Pro tip: Reseal grout every 1–2 years in showers and high-moisture areas, every 3–5 years in lower-traffic areas. It takes 15 minutes and dramatically extends the life of the grout.
Common Mistakes to Avoid
Mixing too much grout at once. Grout has a 30-minute working window. Mix small batches you can use before it stiffens. Wasted mixed grout is cheaper than a botched job from rushing.
Not slaking the grout. Skipping the 5–10 minute rest after initial mixing means the polymers haven’t fully activated. The grout is harder to apply and more prone to cracking.
Applying grout in straight lines. Always apply diagonally across the joints. Straight-line application drags grout back out of the joints instead of packing it in.
Cleaning too early or too late. Too early pulls grout from joints; too late means you’re scrubbing hardened haze. The 15–30 minute window is real — watch the clock.
Using too much water when cleaning. Excess water weakens grout and causes efflorescence. Wring the sponge until it’s barely damp.
Not sealing. Unsealed grout in a bathroom will be stained and moldy within months. Sealing takes 15 minutes and lasts years.
Frequently Asked Questions
How long does grout take to dry before you can walk on it?
You can walk carefully on grouted floor tile after 24 hours, but avoid heavy traffic and don’t get it wet. Full cure takes 48–72 hours for most cement-based grout. Don’t seal until after the full cure period. In humid conditions or cold temperatures, add 24 hours to these estimates.
How do I remove hardened grout haze from tile?
If the haze has fully hardened, a commercial grout haze remover (like SCI Grout Haze Remover) applied with a scrub pad will dissolve it. For natural stone tile, use a stone-safe cleaner — acidic haze removers will etch marble and travertine. For severe haze, a professional tile cleaning service may be needed.
Can I grout the same day I set tile?
No — wait at least 24 hours for thin-set mortar to cure before grouting. Grouting too early compresses uncured mortar, which can shift tiles, cause lippage (uneven tile edges), and result in poor grout adhesion. Some mortars require 48–72 hours — check the bag.
Why is my grout cracking after it dries?
Cracked grout usually comes from one of three causes: grout mixed too wet (too much water), joints that were too shallow (under 2/3 tile depth), or grouting over movement joints (corners and changes in plane should be caulked, not grouted). For corners and perimeter joints, use matching caulk instead of grout — grout is rigid and will crack wherever there’s structural movement.
Should I use grout or caulk in the corner where the wall meets the tub?
Always use caulk, never grout, in the joint where the wall tile meets the tub or shower floor. This is a movement joint — the tub flexes under weight and the wall moves slightly with temperature changes. Rigid grout in this joint will crack within months. Use a color-matched silicone caulk. See our guide: How to Caulk a Bathtub.
The Bottom Line
Grouting tile is a skill that improves dramatically with one or two projects. The technique is straightforward: mix to peanut butter consistency, apply diagonally, pack the joints firmly, clean the haze at the right time, and seal after curing.
The most common mistakes — mixing too wet, cleaning too late, and skipping the sealer — are easy to avoid once you know what to watch for. Get those right and the finished result looks professional regardless of your experience level.
Related posts (internal links):