
This post contains affiliate links. If you buy through our links, we may earn a small commission at no extra cost to you.
Drywall holes don’t need a contractor. Here’s how to patch every size — from nail holes to fist-sized gaps — with the right material for each, sanded smooth and ready to paint.
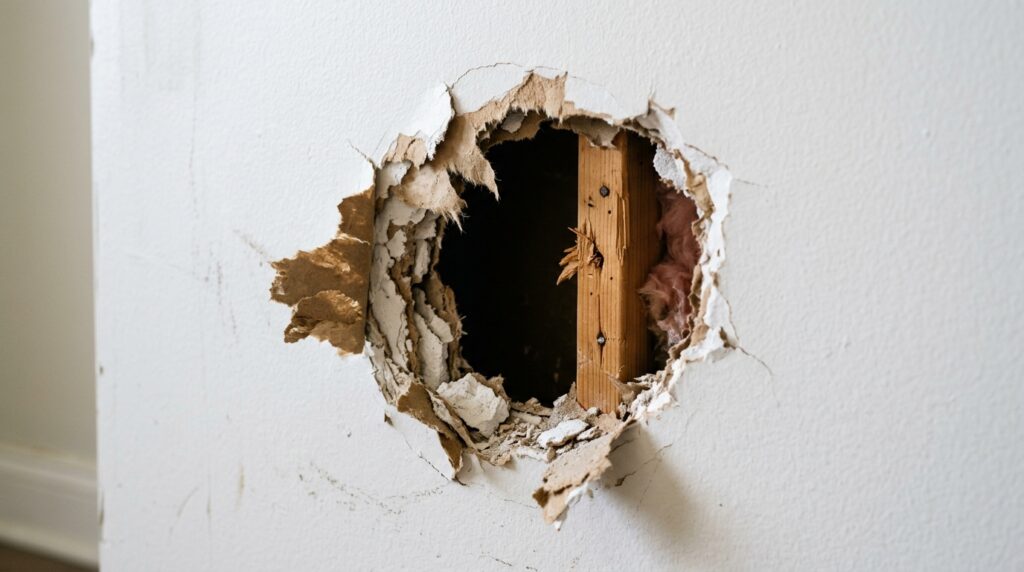
Drywall holes are one of the most common home repair tasks — and one of the easiest to get wrong by using the wrong method for the size. A nail hole needs a different approach than a doorknob dent, which needs a different approach than a large damaged section.
Get the method matched to the size, and any drywall repair is a straightforward job. Get it wrong and the patch telegraphs through the paint.
Quick answer: Nail holes → spackle, smooth, paint. Holes up to 4 inches → peel-and-stick mesh patch + joint compound. Holes over 4 inches → California patch or backing board method. All repairs need primer before paint.
⭐ Essential Product:
3M High Strength Small Hole Repair — pre-mixed, no sanding formula for holes up to 3/4 inch. Dries in 30 minutes, ready to paint. Around $8. Handles 90% of nail holes and small dings in one step — no separate primer needed for most wall colors.
For larger holes:
- Holes up to 3 inches → DAP DRYDex Spackling (~$6)
- Holes up to 6 inches → 3M Large Hole Repair Kit with mesh patch (~$12)
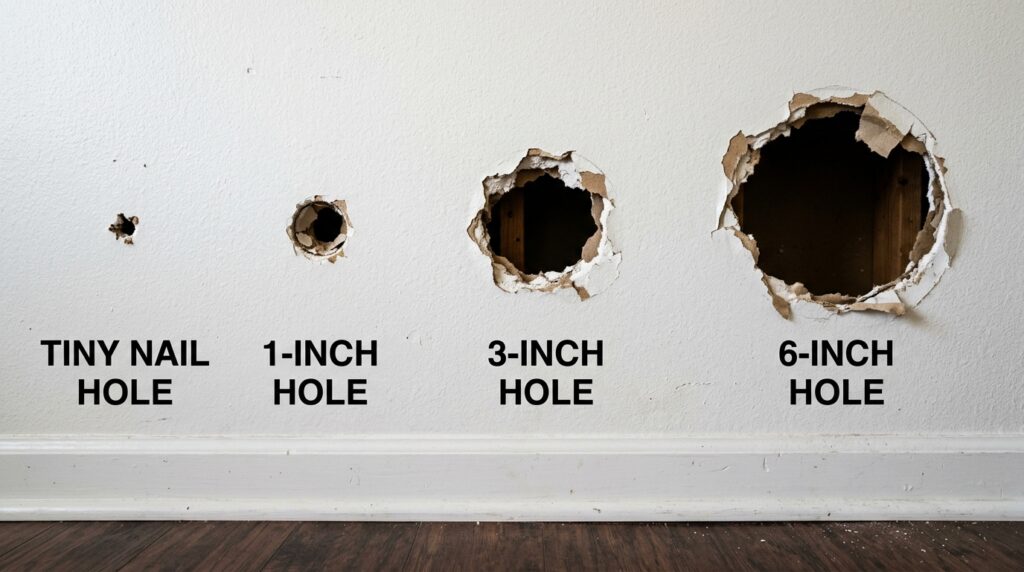
Choose the Right Method by Hole Size
| Hole Size | Method | Materials Needed | Dry Time |
|---|---|---|---|
| Nail hole / small ding (under 1/2 inch) | Spackle + sand | Spackle, 220-grit sandpaper | 30–60 min |
| Small hole (1/2 inch to 4 inches) | Mesh patch + joint compound | Mesh patch, joint compound, knife | 4–24 hrs |
| Medium hole (4–6 inches) | California patch | Drywall scrap, joint compound | 24 hrs |
| Large hole (6+ inches) | Backing board method | Drywall, wood backer, screws, tape | 24–48 hrs |
What You’ll Need
Depending on hole size:
- Spackle or lightweight joint compound
- Putty knife (3-inch and 6-inch)
- Drywall mesh patch (self-adhesive)
- 120-grit and 220-grit sandpaper
- Sanding block
- Primer (oil-based for best results over repairs)
- Paint to match wall
Method 1: Nail Holes and Small Dings (Under 1/2 Inch)
The fastest repair in home maintenance.
- Clean any loose debris from the hole
- Apply a small amount of spackle with your finger or a putty knife — slightly overfill
- Smooth flush with the wall surface using the putty knife edge
- Let dry completely (white spackle turns clear when dry — 30–60 minutes for small holes)
- Sand lightly with 220-grit — one or two passes
- Wipe dust with a damp cloth
- Prime the spot and paint
For walls with texture: After sanding, apply a light coat of wall texture spray before priming. Painting over a smooth patch on a textured wall creates a visible “island” even through paint.
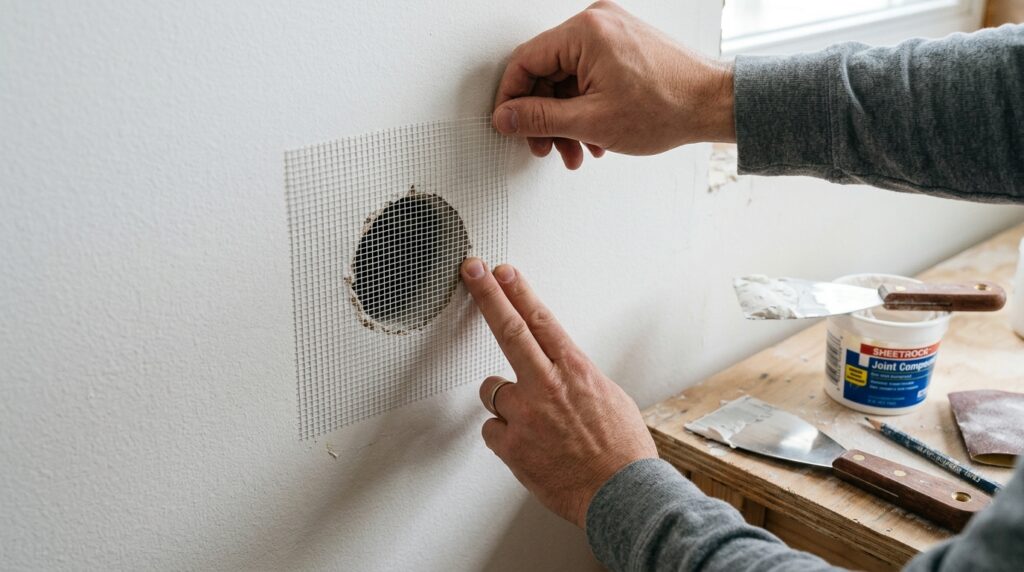
Method 2: Peel-and-Stick Mesh Patch (Holes 1/2 Inch to 4 Inches)
The standard method for most common drywall holes — doorknob dents, fixture removal, accidental damage.
Our Pick: GORILLA Wall Repair Kit, Heavy Duty Spackling, 8 fl oz Tub, 4 in Patch — Includes 3 in Putty Knife, Sanding Block, Lightweight Drywall Filler, Strong Repairs for Walls and Ceilings.
Step 1: Clean the Hole
Remove any loose paper or drywall crumbles. The edges of the hole should be firm.
Step 2: Apply the Mesh Patch
Peel the backing and center the mesh patch over the hole. Press firmly — especially around the edges.
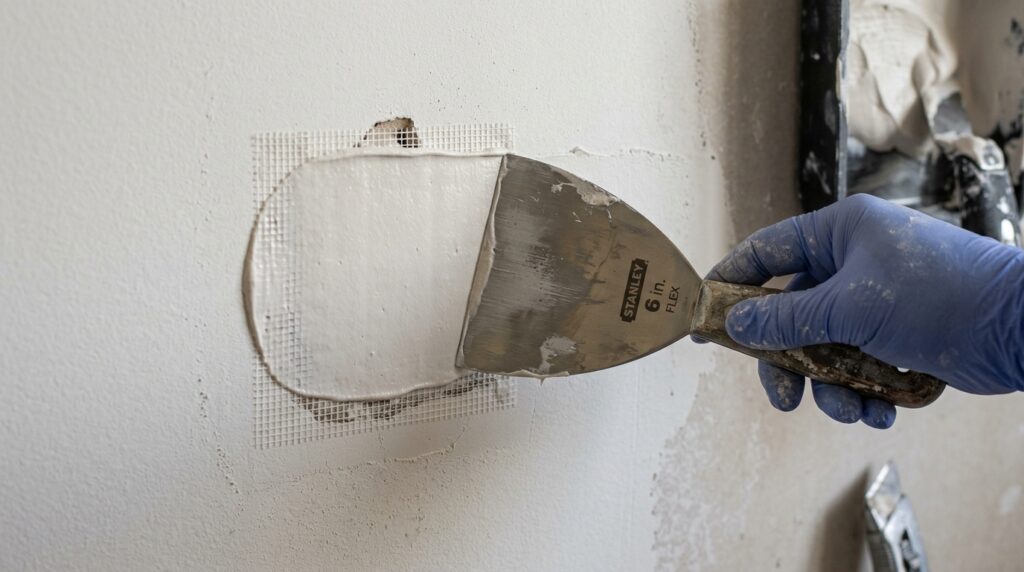
Step 3: Apply Joint Compound (First Coat)
Using a 6-inch putty knife, apply joint compound over the mesh in thin, smooth strokes. Feather the edges 2–3 inches beyond the patch edge. The mesh will be visible through this coat — that’s normal.
Let dry completely. Joint compound is ready when it turns from dark to uniformly light in color — typically 4–6 hours, or overnight.
Step 4: Sand and Second Coat
Sand lightly with 120-grit to knock down any ridges. Apply a second thin coat, feathering even wider (4–5 inches from center). This coat fills the mesh texture and blends the edges.
Let dry, then sand with 220-grit until smooth.
Step 5: Prime and Paint
Apply one coat of primer over the repaired area before painting. Skipping primer causes the repair to show through paint as a dull patch — the compound absorbs paint differently than the surrounding wall.
Method 3: California Patch (Holes 4–6 Inches)
The California patch uses a piece of drywall with the paper facing intact as a built-in tape — no separate mesh or backing required.
Step 1: Cut a Drywall Patch
Cut a piece of drywall slightly larger than the hole (add 2 inches on each side). Score the back with a utility knife and snap to separate the gypsum core, leaving a 2-inch border of paper facing intact on all sides.
Step 2: Trace and Cut the Wall
Hold the patch against the wall and trace around the gypsum core (not the paper border). Cut the wall along the trace lines with a drywall saw.
Step 3: Apply the Patch
Apply joint compound around the hole perimeter. Press the patch in — the paper border laps onto the surrounding wall face. Smooth firmly.
Step 4: Coat and Finish
Apply two thin coats of joint compound over the patch, feathering wide. Sand between coats and after the final coat. Prime and paint.
Method 4: Backing Board Method (Holes Over 6 Inches)
Large holes need structural support behind them — the backing board provides this.
Step 1: Square the Hole
Use a drywall saw to cut the hole into a clean rectangle. This makes patching significantly easier than working around irregular edges.
Step 2: Install Backing Boards
Cut two pieces of 1×3 or 1×4 wood slightly longer than the hole height. Insert each piece into the hole and hold against the inside face of the drywall. Drive drywall screws through the existing wall into the wood on each side — the wood now spans the opening as a backer.
Step 3: Cut and Install Drywall Patch
Cut a piece of drywall to fit the opening exactly. Screw it to the backing boards. Apply drywall tape over all seams (paper tape or fiberglass mesh tape).
Step 4: Coat and Finish
Apply three thin coats of joint compound, feathering wide and sanding between each coat. Final coat should blend seamlessly with the surrounding wall. Prime and paint.
Drywall Repair Quick Checklist
Before starting:
Identified hole size and chosen correct method
Gathered all materials before starting
Wall surface clean and dry
During repair:
Spackle or compound slightly overfilled, not underfilled
Each coat fully dry before sanding or next coat
Feathering edges wider with each coat
Sanding with grain of wall surface
Dust wiped before priming
Before painting:
Repair fully dry (no cool or dark spots)
Surface sanded smooth — no ridges visible at raking light angle
Primer coat applied over repair
Primer fully dry before topcoat
Frequently Asked Questions
How long does drywall compound take to dry? Thin coats dry in 4–6 hours. Thick coats or humid conditions can take 24 hours or longer. Don’t rush — painting over incompletely dry compound causes cracking and peeling. The compound is ready when it’s uniformly white or light in color with no dark or cool spots.
Do I need to use primer before painting a drywall repair? Yes — always. Joint compound is porous and absorbs paint differently than the surrounding wall, creating a visible dull patch even through multiple coats of paint. One coat of primer seals the repair and gives paint an even base. Use an oil-based primer for best stain-blocking and adhesion over repairs.
Why does my drywall patch show through paint? Two causes: not enough feathering (the edges of the compound create a visible ridge) or skipped primer (the repair absorbs paint differently). Sand until you can’t feel the edge by touch, and always prime before painting.
Can I use spackle for large holes? Spackle is designed for small holes — up to about 3 inches with multiple coats. For larger holes, use joint compound (also called “mud”) — it’s designed for larger fills and is sanded more smoothly. Spackle in large applications tends to crack as it dries.
How do I match wall texture after a repair? For smooth walls, feathering the compound thin and sanding carefully creates a smooth surface that disappears under paint. For textured walls (orange peel, knockdown), apply wall texture spray after sanding and before priming. Practice on cardboard first — texture spray takes a few tries to match.
The Bottom Line
Drywall repair is almost entirely about using the right method for the hole size and giving each step enough dry time. Nail holes take 30 minutes. Holes up to 4 inches take one day. Large holes take a weekend. The result in every case is a wall that looks untouched under paint.
After repairs are done, our guide on how to paint a room covers the full sequence from cutting in to rolling — including how to handle repaired sections in the prep step.
Have questions about your specific repair? Leave a comment below.
Related posts: