
This post contains affiliate links. If you buy through our links, we may earn a small commission at no extra cost to you.
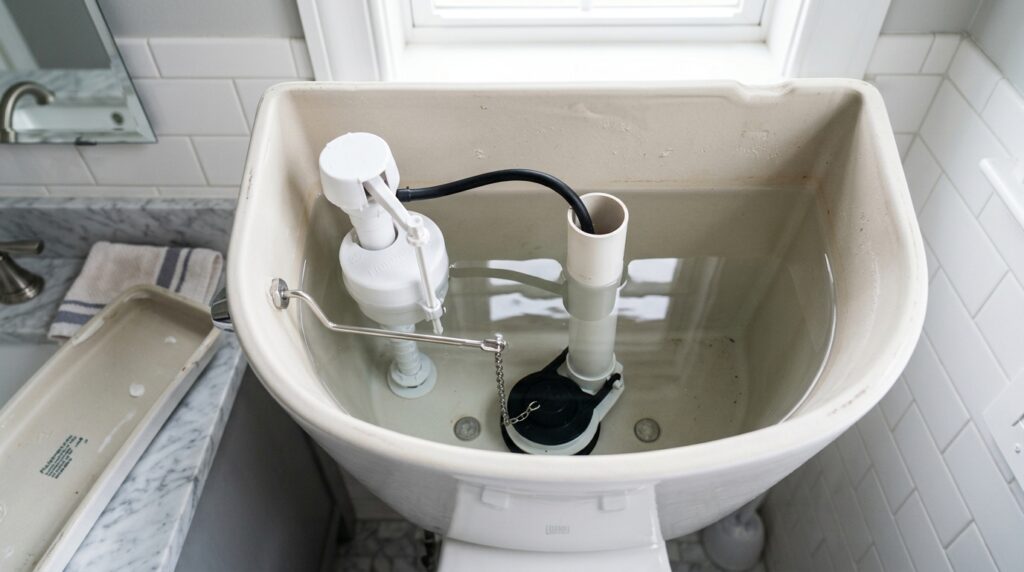
A running toilet wastes 200 gallons of water per day — that’s roughly $70/month added to your water bill if left unfixed. The sound of water constantly trickling or hissing in the tank is one of the most fixable plumbing problems in a home, and 90% of cases come down to one of three parts, all of which cost under $15.
Quick answer: Lift the tank lid and watch what happens after a flush. If water trickles into the bowl, the flapper is bad. If water runs into the overflow tube, the float is set too high. If the fill valve keeps running after the tank fills, the fill valve needs replacing. Each fix takes 10–20 minutes.
Here’s how to diagnose and fix each one.
What You’ll Need
Depending on the diagnosis, one or more of these:
- Replacement flapper (most common fix)
- Fill valve replacement kit
- Toilet repair kit (includes flapper + fill valve — best value if both are old)
- Adjustable pliers
- Sponge and bucket (to empty the tank if needed)
Our Top Pick — Toilet Repair Kit: Fluidmaster 400AH PerforMAX Fill Valve and Flapper Repair Kit — includes both fill valve and flapper, fits most toilets, installs without tools. Around $25. If your toilet is more than 5 years old, replacing both at once makes sense — they wear at similar rates.
For Flapper Only: Fluidmaster 502P21 Universal Water-Saving Toilet Flapper — fits most 2-inch flush valve seats, adjustable for water savings, easy snap-on install. Around $6.
Step 1: Diagnose the Problem
Remove the tank lid and set it aside carefully — tank lids are ceramic and break easily.
Watch what happens after flushing. Three things to look for:
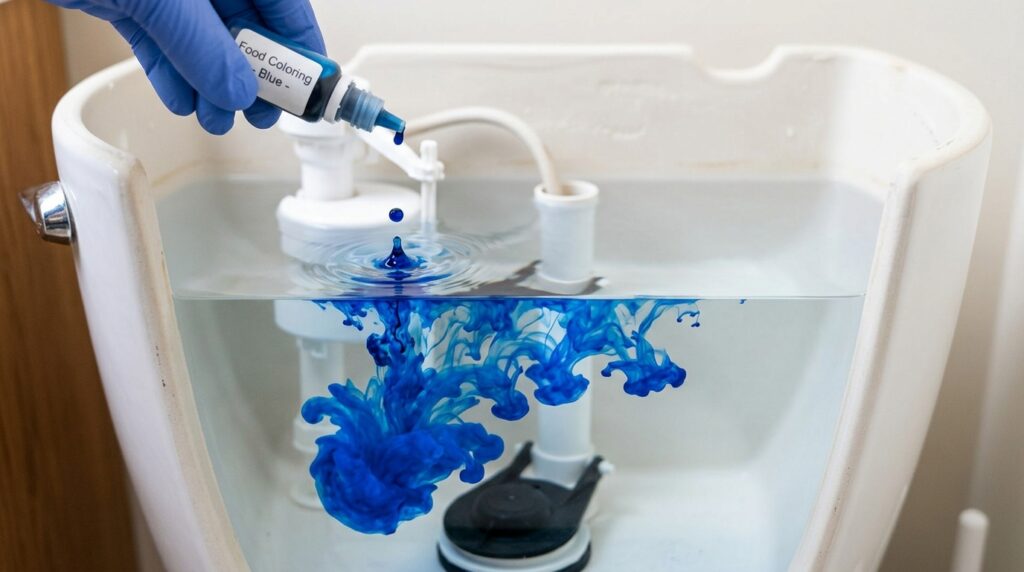
Test 1: The Food Coloring Test (Flapper Check)
Drop a few drops of food coloring into the tank. Wait 10 minutes without flushing. If color appears in the bowl, water is leaking through the flapper — the flapper needs replacing.
Test 2: Check the Overflow Tube
Look at the tall tube in the center of the tank (the overflow tube). If water is running into it, the water level is too high — the float needs adjustment or the fill valve needs replacing.
Test 3: Listen After the Tank Fills
After the tank fills completely, does the fill valve keep hissing or running? If yes, the fill valve is worn and needs replacing.
Step 2: Fix a Bad Flapper
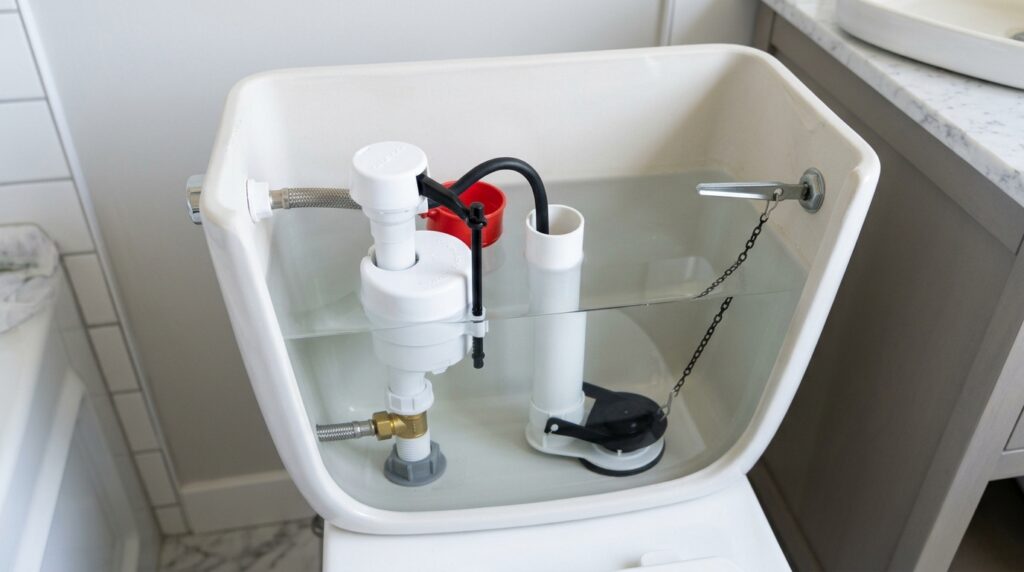
The flapper is the rubber seal at the bottom of the tank that lifts when you flush and seals when the tank refills. Over time, it warps, hardens, or develops mineral deposits that prevent a complete seal.
How to Replace a Flapper
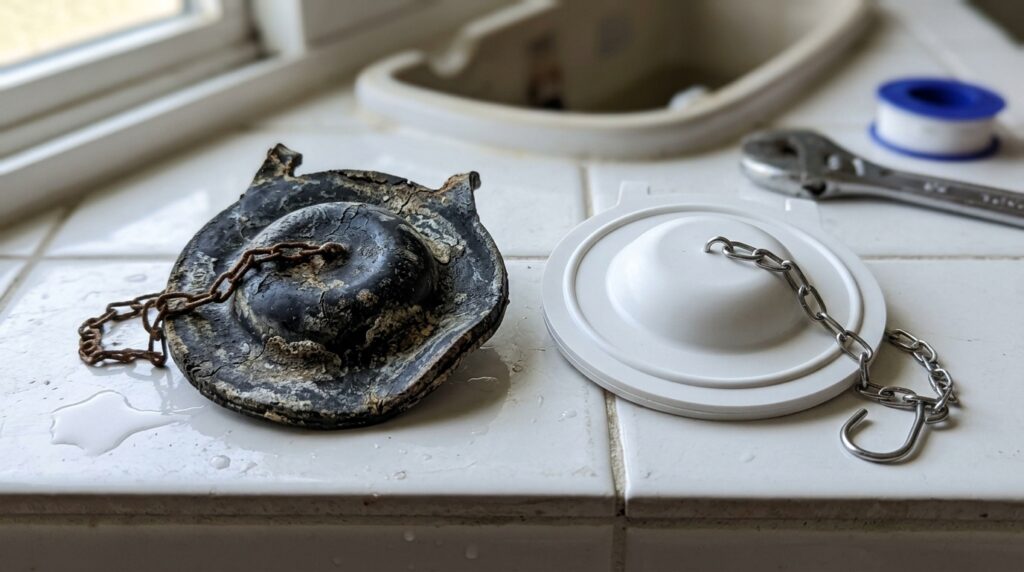
Remove the old flapper.
- Turn off the water supply. The shutoff valve is on the wall behind and below the toilet. Turn clockwise to close.
- Flush the toilet to empty the tank.
- Remove the old flapper. Unhook the ears from the pegs on the overflow tube and disconnect the chain from the flush handle arm.
- Take the old flapper to the hardware store or match the size (most are 2-inch, some are 3-inch for larger flush valves) before buying a replacement.
- Snap the new flapper onto the pegs of the overflow tube.
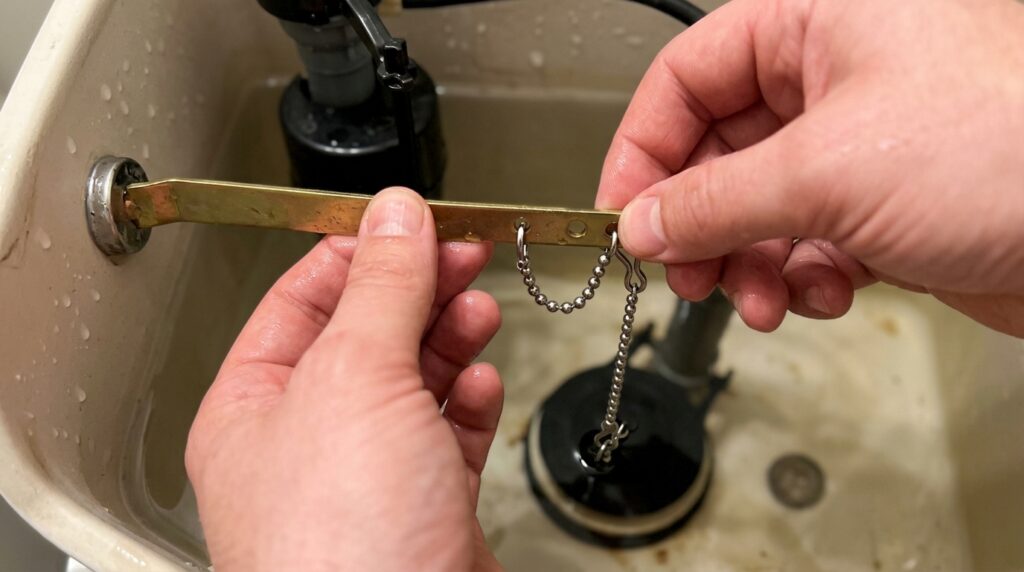
- Connect the chain to the flush handle arm. Leave ½ to 1 inch of slack — too tight and the flapper won’t seal; too loose and it won’t lift fully.
- Turn the water back on and let the tank fill.
- Test: Flush and watch. If the running stops, done. Run the food coloring test again to confirm.
Take the old flapper to the hardware store
Chain length matters. A chain with no slack holds the flapper open and causes a constant trickle. A chain with too much slack gets caught under the flapper and causes intermittent running. ½ to 1 inch of slack is the target.
Step 3: Adjust or Replace the Float
The float controls the water level in the tank. When the float is set too high, the tank overfills and water runs into the overflow tube continuously.
Identify Your Float Type
Ball float (older style): A ball on the end of an arm. To lower the water level, bend the arm downward slightly or turn the adjustment screw at the base of the arm clockwise.
Cup float (modern style): A cylindrical float that rides on the fill valve shaft. To lower the water level, pinch the clip on the side of the float and slide it down the shaft. The water level should sit 1 inch below the top of the overflow tube.
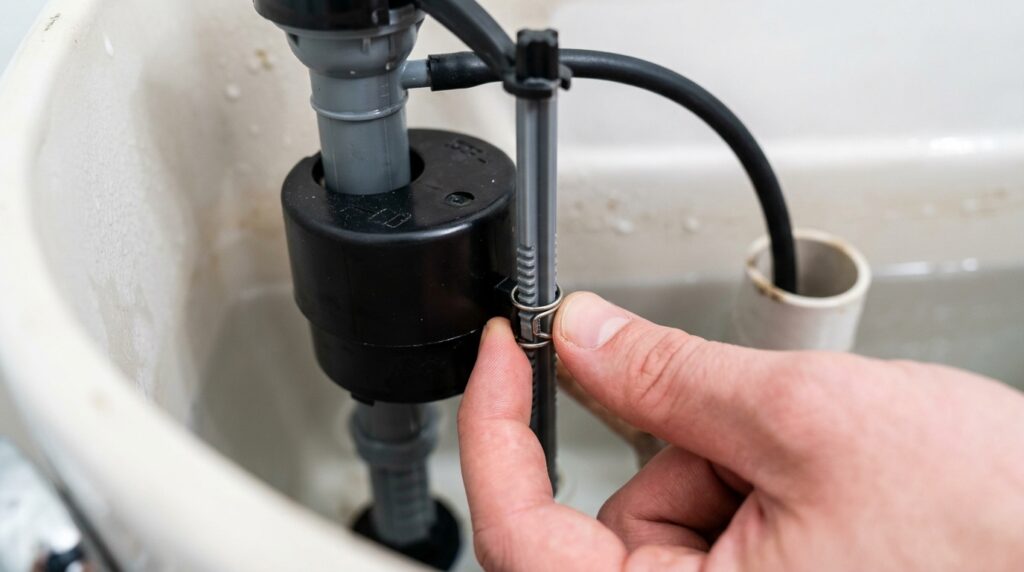
After adjusting, flush and let the tank refill. Watch the water level — it should stop filling before reaching the overflow tube. If it still runs over, the fill valve itself may need replacing (Step 4).
Step 4: Replace the Fill Valve
If the fill valve keeps running after the tank is full, or if adjusting the float doesn’t solve the overflow problem, the fill valve needs replacing. This is the most involved of the three fixes but still straightforward.
How to Replace a Fill Valve
- Turn off the water supply at the shutoff valve.
- Flush the toilet and hold the handle down to empty as much water as possible.
- Sponge out remaining water from the tank bottom.
- Disconnect the water supply line from the bottom of the tank (have a towel ready — some water will drip).
- Remove the old fill valve. Inside the tank, hold the fill valve body steady. Outside the tank, unscrew the locknut counterclockwise by hand or with pliers.
- Install the new fill valve. Insert through the hole in the tank bottom, hand-tighten the locknut from outside (don’t overtighten — the tank is ceramic).
- Set the height. Most fill valves are adjustable — set the critical level mark 1 inch above the overflow tube.
- Reconnect the water supply line.
- Turn the water on slowly and let the tank fill.
- Check the water level — it should stop 1 inch below the top of the overflow tube. Adjust the float if needed.
- Flush several times and confirm the valve stops running when the tank is full.
What If the Toilet Still Runs?
If you’ve replaced the flapper and fill valve and the toilet still runs, two remaining possibilities:
Cracked overflow tube: Rare, but a crack in the overflow tube causes water to drain into the bowl constantly. Inspect it with a flashlight. If cracked, the flush valve assembly needs replacing — a slightly more involved repair.
Worn flush valve seat: The seat where the flapper rests may be cracked or pitted from mineral deposits, preventing the flapper from sealing regardless of its condition. Sand the seat lightly with fine-grit wet/dry sandpaper, or replace the flush valve.
If neither of these resolves it, call a plumber — at this point the issue is inside the flush valve assembly and requires removing the tank from the bowl.
How Much Water Does a Running Toilet Waste?
| Severity | Water Wasted | Estimated Monthly Cost |
|---|---|---|
| Slow trickle (flapper seep) | 30–50 gallons/day | $5–$10 |
| Moderate run | 100–200 gallons/day | $15–$35 |
| Full running (overflow) | 200–400 gallons/day | $35–$70+ |
A $6 flapper or $15 repair kit pays for itself in 1–2 days of water savings for a moderate run. There’s no home repair with faster ROI.
Frequently Asked Questions
How do I know if my toilet is running silently? Silent leaks are common — the flapper seeps slowly without making noise. Use the food coloring test: add dye to the tank, wait 10 minutes, check the bowl. Any color in the bowl means you have a leak even if you can’t hear it.
Can I replace a flapper without turning off the water? Technically yes — you can flush, then quickly swap the flapper before the tank refills. But it’s messy and rushed. Turning off the shutoff valve takes 5 seconds and makes the job clean and controlled. Always turn off the water.
My toilet runs for a few seconds after flushing, then stops. Is that normal? Brief running (5–10 seconds) after a flush as the tank refills is normal. Running that continues more than 30 seconds after the tank should be full indicates a problem — usually a flapper or float issue.
How long do toilet flappers last? Typically 3–5 years, depending on water quality. Hard water with high mineral content degrades rubber faster. If you’re replacing the flapper more than once every 2–3 years, consider a silicone flapper — they last significantly longer than rubber.
Should I repair or replace a running toilet? Repair in almost every case. A toilet that runs is almost never a reason to replace the toilet — the tank components are cheap and independent of the bowl. Replace the toilet only if the bowl or tank is cracked, or if it’s an older low-efficiency model (pre-1994) where a modern 1.28 GPF toilet would save significant water long-term.
The Bottom Line
A running toilet is almost always a $6–$15 fix. Diagnose it in 5 minutes with the food coloring test and the overflow tube check, then replace whichever component is failing. Flapper first — it’s the cause in 80% of cases. Fill valve second if the flapper doesn’t solve it.
The longer you wait, the more water you waste. A moderate running toilet costs more per month than the repair kit costs in total.
For other common bathroom fixes, our guide on how to unclog a bathroom sink drain covers the next most common bathroom plumbing problem — worth bookmarking for your maintenance toolkit.
Have questions about your specific toilet? Leave a comment below.
Related posts: