
This post contains affiliate links. If you buy through our links, we may earn a small commission at no extra cost to you.
Laminate flooring is one of the most DIY-friendly home improvement projects you can take on. No nails, no glue, no special skills — the planks click together and float over the subfloor. Most homeowners finish a room in a weekend.
The key is preparation. Get the subfloor right, plan your layout before you cut anything, and the installation itself is straightforward. Rush those steps and you’ll be pulling up planks to fix mistakes.
Here’s the complete process, step by step.
Quick answer: Laminate flooring installs as a floating floor — planks click together and rest on underlayment without being attached to the subfloor. Acclimate the planks 48 hours before installation, leave a ¼” expansion gap around all walls, and work row by row from left to right. A pull bar and tapping block are the only specialty tools you need.
What You’ll Need (Tools + Materials)
Tools:
- Tape measure and pencil
- Circular saw or miter saw — for straight cuts
- Jigsaw — for cuts around door frames and obstacles
- Tapping block — protects the click joint when tapping rows together
- Pull bar — for closing the last row against the wall
- Spacers — maintains the expansion gap along walls (¼” is standard)
- Rubber mallet
- Safety glasses and knee pads
🔗 Our Top Pick: Roberts 10-630 Pull Bar and Tapping Block Kit (Amazon)
Materials:
- Laminate flooring planks — buy 10% more than your square footage to account for cuts and waste
- Underlayment — provides cushioning, moisture barrier, and sound reduction (some laminate has underlayment pre-attached)
- Transition strips — for doorways and where laminate meets other flooring
- Quarter round or base shoe molding — covers the expansion gap at walls
🔗 Our Top Pick: FloorMuffler Ultraseal Underlayment (Amazon)
💡 Pro tip: Check whether your laminate already has underlayment attached to the back. If it does, don’t add a second layer — double underlayment makes the floor feel spongy and can cause the click joints to fail over time.
Before You Start: Acclimate and Prep the Subfloor
Step 1: Acclimate the flooring. Bring the laminate boxes into the room where they’ll be installed and let them sit for at least 48 hours (72 is better). Laminate expands and contracts with temperature and humidity — acclimating prevents gaps or buckling after installation.
⚠️ Don’t skip acclimation. Installing laminate that hasn’t acclimated is the #1 cause of post-installation buckling and gap problems. 48 hours is the minimum — manufacturers often require it to honor the warranty.
Step 2: Remove existing flooring and baseboards. Take off the base shoe or quarter round molding carefully — you can reuse it. Remove carpet, old vinyl, or other flooring down to the subfloor. Laminate can go over existing hardwood if it’s in good condition, but check manufacturer specs.
Step 3: Check the subfloor for level. The subfloor must be flat within 3/16″ over 10 feet. Use a long straightedge to identify high and low spots. High spots: sand or grind down. Low spots: fill with floor leveling compound and let cure completely.
Step 4: Check moisture. Laminate and moisture don’t mix. Use a moisture meter to test the subfloor — readings above 12% for wood subfloors or 5 lbs/1,000 sq ft for concrete require a moisture barrier or may disqualify laminate entirely. When in doubt, use a quality underlayment with a built-in vapor barrier.
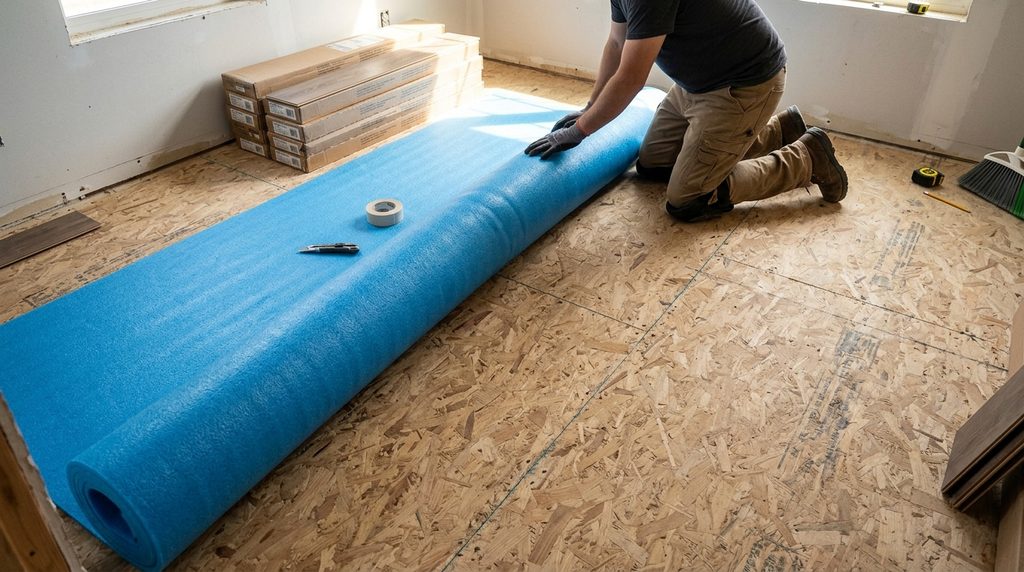
Step 5: Install underlayment. Roll out the underlayment perpendicular to the direction you’ll install the planks. Tape seams with the manufacturer’s recommended tape. Don’t overlap — butt edges together tightly.
Plan Your Layout (Don’t Skip This)
A few minutes of planning prevents the most common laminate mistakes: ending up with a sliver of plank at one wall, or having the pattern look off-center in the room.
Run the planks parallel to the longest wall or toward the main light source — this makes the room look larger and hides seams better.
Calculate your starting row width. Measure the room width and divide by the plank width. If the last row would be less than 2″ wide, cut the first row narrower to balance it. Example: room is 12’4″ wide, planks are 5″ wide: 12’4″ = 148″. 148 ÷ 5 = 29.6 rows. The last row would be 3″ — acceptable. If it were under 2″, cut the first row to 4″ so the last row is also 4″.
Stagger end joints by at least 12″. Never align end joints between adjacent rows — it weakens the floor and looks amateur. Start the second row with a cut-off piece from the first row’s last plank, as long as it’s at least 12″ long.
💡 Pro tip: Mark your starting line with chalk or tape. A straight first row is the foundation for the entire floor — if it wanders, every subsequent row wanders with it.
Step-by-Step: Installing Laminate Flooring
Step 1: Place spacers along the starting wall. Set ¼” spacers against the wall to maintain the expansion gap. This gap is critical — laminate expands and contracts seasonally, and without the gap it will buckle.
Step 2: Lay the first row. Place planks tongue-side toward the wall, groove-side facing the room. Connect end joints by angling one plank into the next at about 20 degrees, then pressing flat — you’ll hear a click. Work left to right along the wall.
Step 3: Cut the last plank in the row. Measure from the end of the last full plank to the spacer. Subtract ¼” for the expansion gap and cut. Save the cut-off piece — use it to start the next row if it’s at least 12″ long.
Step 4: Start the second row. Begin with the cut-off piece from row 1 (if long enough) or a plank cut to create a 12″+ offset from the first row’s end joint. Connect the long edge to row 1 by angling the plank into the groove at about 20 degrees and pressing flat.
Step 5: Use the tapping block to close gaps. Place the tapping block against the groove edge and tap with a rubber mallet to fully seat the joint. Never tap directly on the plank — you’ll damage the click mechanism.
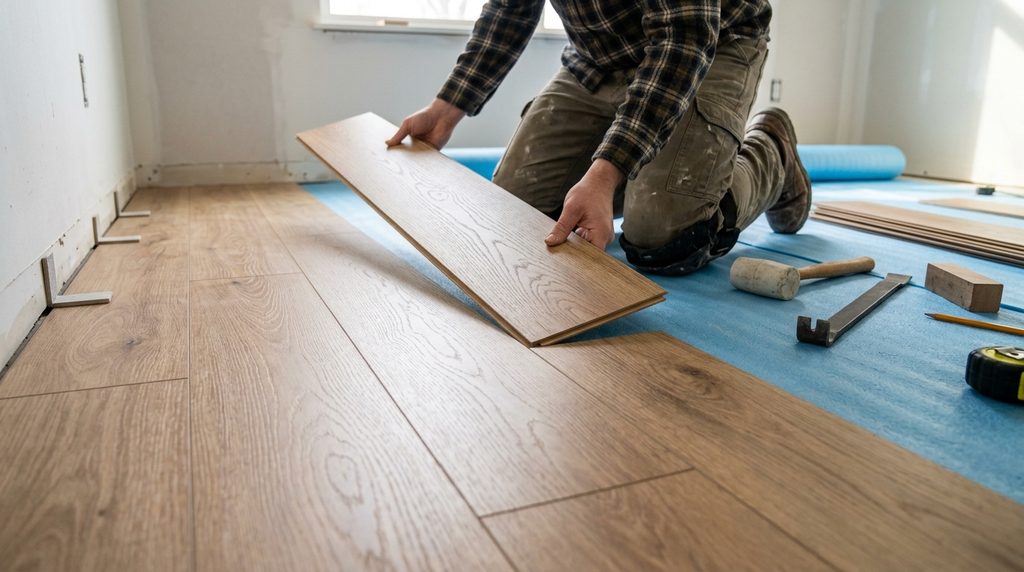
Step 6: Continue row by row. Repeat the process, staggering end joints and using spacers along all walls. Check every 3–4 rows with a tape measure that the rows are still running parallel to the wall — correct small deviations before they compound.
Step 7: Install the last row. Measure and cut each plank to fit, accounting for the expansion gap. Use the pull bar hooked over the groove edge and tap with a mallet to pull the last row tight against the previous row.
Step 8: Remove spacers and install molding. Pull out all spacers. Install quarter round or base shoe molding to cover the expansion gap. Nail the molding to the baseboard — never to the floor itself. This is critical: nailing through the floor pins it down and causes buckling.
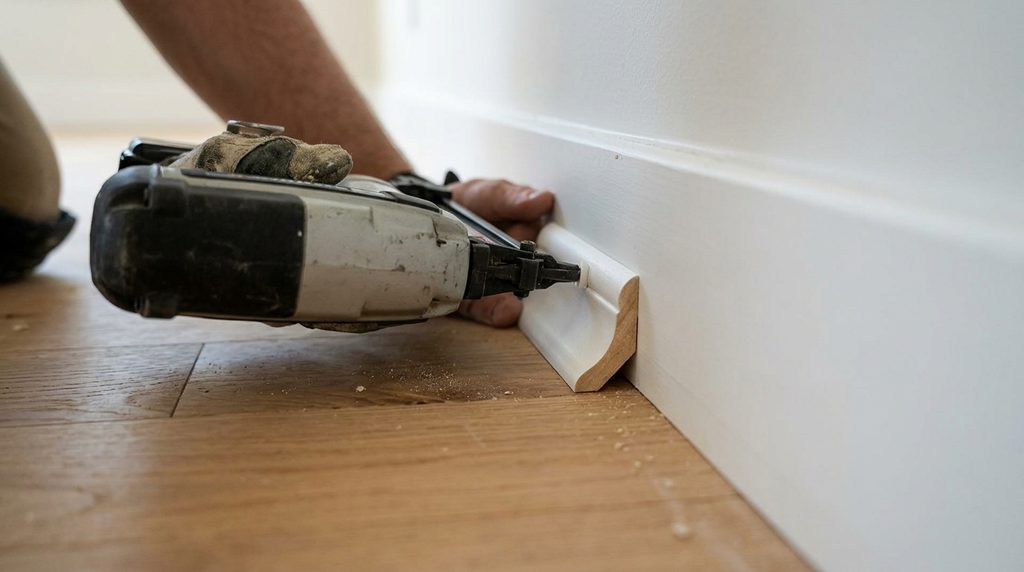
⚠️ Never nail or glue laminate to the subfloor. It’s a floating floor — it needs to move freely. Pinning it down prevents expansion and causes buckling, especially near heat sources and in humid climates.
How to Handle Cuts, Doorways, and Transitions
Cutting around door frames: Use a handsaw or oscillating tool to undercut the door casing so the laminate slides underneath rather than butting up against it. Hold a scrap piece of laminate (plus underlayment thickness) against the casing and cut along the top of it. The plank slides under cleanly and the joint is hidden.
Cutting around pipes and obstacles: Trace the obstacle onto the plank, drill a hole slightly larger than the pipe diameter, then cut from the edge of the plank to the hole with a jigsaw. The cut is hidden by a pipe escutcheon or trim piece.
Transition strips: Where laminate meets a different flooring type or another room, install a T-molding transition strip. These snap or glue into a track that’s secured to the subfloor in the gap between floors.
| Transition type | When to use |
| T-molding | Between two floors of equal height (laminate to laminate, or laminate to hardwood) |
| Reducer | Between laminate and a lower floor (laminate to vinyl or tile) |
| End cap / stair nose | At doorways, stairs, or where flooring ends at a vertical surface |
| Threshold | At exterior doorways or sliding glass doors |
Common Mistakes to Avoid
Skipping acclimation. Already covered — it causes buckling and gaps. Non-negotiable.
Not checking the subfloor for level. High spots cause planks to rock and click joints to fail. Low spots cause the floor to feel hollow and springy. A flat subfloor is the foundation of a good installation.
Forgetting the expansion gap. ¼” along every wall, every doorway, every fixed object. Without it, the floor will buckle as it expands — guaranteed.
Short end joints. End pieces shorter than 6″ are unstable and prone to popping up. If a cut leaves you with a short piece, move your starting point to avoid it.
Not staggering joints. Aligned end joints look bad and weaken the floor structurally. Minimum 12″ offset between rows.
Nailing the molding through the floor. Quarter round must be nailed to the baseboard, not the floor. Pinning the floor prevents expansion and causes buckling.
Frequently Asked Questions
Can I install laminate flooring over existing tile or hardwood?
Over hardwood: yes, if the existing floor is flat, secure, and not more than ¾” thick (adding height creates transition issues at doorways). Over tile: yes, if the tile is fully adhered with no loose pieces and the surface is flat. Over carpet: no — carpet is too soft and compressible to support a floating floor properly.
How long does it take to install laminate flooring in a room?
A 12×12 room (144 sq ft) takes most DIYers 4–6 hours of actual installation time, not counting prep. Add 2–3 hours for subfloor prep if needed, and factor in the 48-hour acclimation period before you start. A full weekend is a comfortable timeline for a first-time installer.
What thickness of laminate should I buy?
8mm is the minimum for comfortable feel underfoot. 10–12mm is better — noticeably more solid and quieter. AC3 or AC4 wear rating for residential use. If the laminate doesn’t include underlayment, buy a 2–3mm underlayment separately. Thicker doesn’t always mean better — check the manufacturer’s specifications for your subfloor type.
Can laminate flooring get wet?
Standard laminate is water-resistant on the surface but not waterproof. Spills should be wiped up immediately. Standing water will seep into seams and swell the core. For bathrooms, laundry rooms, or basements, use waterproof LVP (luxury vinyl plank) instead — it’s designed for wet areas. Some newer laminate products are labeled waterproof; check the spec sheet before installing in wet areas.
Do I need underlayment if my laminate already has it attached?
No — don’t add a second layer. Double underlayment makes the floor feel spongy and can cause the click joints to flex and eventually fail. If your laminate has pre-attached underlayment, install directly on the clean, flat subfloor (with a vapor barrier on concrete). If it doesn’t have pre-attached underlayment, you need to add a separate layer.
The Bottom Line
Laminate flooring is one of the best DIY investments a homeowner can make — durable, affordable, and completely achievable in a weekend without professional help. The installation itself is straightforward once you understand the floating floor concept and the importance of the expansion gap.
Take your time on prep: acclimate the planks, flatten the subfloor, and plan your layout before cutting anything. Get those steps right and the installation clicks into place — literally.
Related posts (internal links):